
I first made up this pattern back in 2008. I made two parachutes for my oldest boys for Christmas by using a jacket that had been given to us. They liked them then and still do today.
In 2010 I had intentions of writing up a tutorial and even took all of the pictures, but never got around to actually writing it. I decided that now was the time, especially after looking at this picture of Joshua with the parachute I made for this tutorial.

Someone tell me where my little boy went!

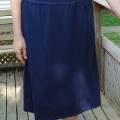
If you want to make one of these (a parachute, not a cute little boy) you will need a few supplies. You will need some nylon fabric. For the parachute pictured above I used a pair of my husband’s old swimming trunks. Jackets, pants, or anything made out of nylon would probably work. You could also purchase new fabric, but upcycling is great, too.
You will also need netting (I used a ripped stroller netting. You want it to be soft, not stiff like tulle.), scissors, a sewing machine, pins, thread, ribbon or elastic, and the pattern piece to complete this project.
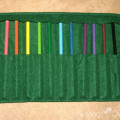
Parachute Pattern Piece

The first thing you will need to do is cut out the pattern piece and lay it on your fabric. You will need to cut 8 triangle shapes.

Pin the pattern pieces together in pairs and then stitch on one long side, with right sides together. I used a straight stitch and a 1/4 inch seam allowance. I then went back over my stitching with a zig-zag stitch for extra durability.

Next, pin and stitch two pairs together in the same manner as above. You will end up with two half circles containing 4 pieces in each.

Pin and stitch the two half circles together, right sides together just like you did before.

If everything went correctly you should now have a big circle. Lay the circle on top of the netting and cut around it. Your circles should be approximately 19 inches in diameter.
Stitch the two circles, right sides together, using a 1/4 inch seam allowance to sew a straight seam and a zig-zag seam as in the previous steps. The netting can be a little tricky, so take your time.

Now, find the center of the netting circle and cut a small hole (approx. 1/2 inch). Pull the nylon circle through the netting circle so that both pieces are right sides out.

Here is what your parachute should look like now. We’re almost done.

Next, take a piece of elastic, ribbon, or bias tape that is about 6 inches long and fold one end over the hole in the netting. Stitch over it several times to secure it. You don’t want this ripping off.

Now, you need to add a weight to the parachute. You can do any number of things. For the first parachutes I made, I made a small pouch and put 2 small stones inside. For this parachute, I decorated a clothespin and attached it to the elastic.

Now your parachute is finished and ready for action. These parachutes have provided my children with some fun times. The best part? They didn’t cost me a dime because I used upcycled items. Yay!
If you think a child in your life might enjoy a parachute, I hope you will give this a try. Let me know if you do.

Pingback: This Week’s Favorites - Valentines Day Edition()
Pingback: Toy Parachute: Homemade Christmas Gifts()