Blessings Overflowing

Simple Joyful Living

  • Home
  • About
    • Disclosure Policy
  • Contact
  • Activities for Kids
    • Alphabet Preschool Activities
    • Sunday School Crafts
  • DIY
  • Home Management
    • Recipes
    • Gardening
    • Natural Living
    • Parenting
  • Encouragement
    • Random Thoughts

Fleece Travel Pillow Tutorial

June 8, 2012 By Jackie 7 Comments

Are you going to be traveling this summer? If you are, then I have an easy sewing project for you today.

This idea was born out of a desire to have a comfy pillow for my kids when we are traveling that doesn’t take up much room. With 5 kids space is at a premium, even in an 8 passenger vehicle.

Not only that, but don’t you often find it tough to make a regular sized pillow feel comfortable when you are in the car? Maybe that’s just me, but I am really hoping this pillow solves that problem, too.

Julia was happy to test out her pillow for the purpose of this post. Obviously, this photo was staged because there are no boys in the background trying to get into the picture. 🙂

If you would like to make 1, or even 7 pillows like I did, here are the easy instructions.

Supplies

  • Fleece Fabric
  • Ruler
  • Scissors
  • Stuffing
  • Pins
  • Needle
  • Thread
  • Rotary Cutter (optional)

Instructions

1. Cut 2 pieces of fleece that are 8 inches by 22 inches for a child-sized pillow. For an adult pillow, cut 2 pieces of fleece that are 8 inches by 26 inches.

2. Select the triple stretch stitch on your machine to ensure the seams of the pillow won’t bust apart. The stitch is usually denoted by 3 lines of stitching on a sewing machine. It basically makes 1 stitch forward, 1 stitch backward, and 1 stitch forward when a regular stitch would just be 1 stitch forward.

If you have kids you will understand why I am telling you to use this stitch. 😉

3. With right sides together, stitch around the pieces of fleece using a 1/4 inch seam allowance. Leave an opening for turning that is approximately 3-4 inches wide on one side of the pillow.

This is what the pillow should look like after stitching. The opening on this pillow is on the right short side.

4. Turn the pillow right side out through the opening.

5. Stuff the pillow with stuffing (I used polyester stuffing.). Do not overstuff the pillow. (Yes, I realize this is a different colored pillow, but I forgot to take a picture of the pink pillow.)

6. Sew the opening closed by either using a triple stretch stitch, or…

…by hand sewing it closed.

That is all there is to making a travel pillow!

This was such an easy project that I made 4 for my older children, 1 for me, and 2 for my parents.

By not overstuffing the pillow in Step 5, you can even place part of the pillow behind your neck and curve it so that part of it is at the side. Kind of like a boomerang shape.

I would like to say that I am so happy my almost 13 year old was willing to be my model for these pictures. Sometimes Julia will say things like, “You’re not going to put that picture of me on your blog are you?”

Me?

What?

OK.

Yes!

Yes, I am.

🙂

You might also like these posts.

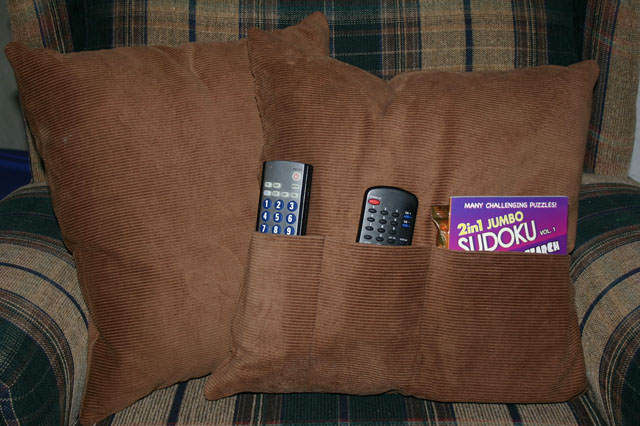
Remote Control Pocket Pillow Tutorial Fleece Hats & Slippers Fleece Scarf Tutorial fabric marble mazeFabric Marble Maze (Tutorial)

Filed Under: Crafts & DIY Tagged With: travel

« {Summer Reading} Pippi Longstocking
Download Grocery University for Free for a Limited Time »
  • Sandy

    Julia, you look so cute as a model! 🙂

    This is so timely, I have been saying I’m going to make one of these for a long time and have yet to do it. I am making one today, as we are going on a car trip tomorrow! Thanks so much for sharing this Jackie!

    • Jackie

      Thanks, Sandy! I will be sure to tell her. 🙂

      I am so glad the timing worked out. Please let me know how your pillow making goes and how well you like it on your trip. Have fun!

      • Sandy

        Love this pillow!! It was so easy to make 🙂 I do not have a lot of fleece in my stash, all I could find was a boring brown, so I added a cute little flower iron-on that I found. I had never used the triple stretch stitch on my machine before, but will be using it more often. Thanks again for the great tutorial Jackie 🙂

        • Jackie

          Awesome, Sandy! I bet your flower embellishment is cute. I didn’t do anything extra to my pillows, but that is a nice idea for another time. So glad you liked the tutorial. 🙂

  • Tonya

    I used buckwheat as a filler and it’s wonderful! It’s very reminiscent of bean bags and my kids LOVE it! I’ve made four so far and my 3 year old son keeps stealing them to cuddle with! (Good thing I bought enough to make him one as well!) This is so fast and simple that I have been able to whip up 7, in my “spare” time, in the last two days - and this was the first time I’ve EVER successfully used a sewing machine - so goodness knows it’s not because I’m that “good”! hahaha

    • Tonya

      I meant to say I will be whipping up 7, not that I have already. Oops! 🙂

      • Jackie

        Awesome, Tonya! I am so happy you were able to successfully use your sewing machine. You are going to love sewing. 🙂

        I had never thought to use buckwheat. Where did you purchase it? How did the pillows turn out? I bet the recipients loved them. Thanks so much for sharing!

  • 
  • 
  • 
  • 
  • 
  • 

Subscribe for Email Updates

Popular Posts

You Are My Sunshine Footprint Art
“Tire
“Easy
“Placemat
“Cooking
“Crockpot
“Travel

Topics

Announcement

In 2014 I closed my blog Pocketful of Posies. All of the posts from Pocketful of Posies are now in the Activities for Kids category on this blog. Some of the pictures didn't transfer over, but I'm working on it.

Instagram

Pinterest

Visit Jackie's profile on Pinterest.

Facebook

Blessings Overflowing

Copyright © 2016 · Blessings Overflowing · Built on the Genesis Framework · Designed by Strong Tower Design