Blessings Overflowing

Simple Joyful Living

  • Home
  • About
    • Disclosure Policy
  • Contact
  • Activities for Kids
    • Alphabet Preschool Activities
    • Sunday School Crafts
  • DIY
  • Recipes
    • Gardening
    • Home Management
    • Natural Living
    • Parenting
  • Encouragement
    • Bible Reading Plans

Fix It Up Friday: Easy Baby Skirt & Headband (Tutorial)

July 15, 2011 By Jackie Leave a Comment

(Here is the official version of the post I accidentally sent out on Wednesday night, that I then deleted, that still showed up in feed readers.)

Photobucket

Good morning! It is time for Fix It Up Friday again. I am so glad to have you join me. Thank you to all of you who linked up last week. If you are a blogger and have a creative post to link up, please do so.  I always love to see what other people create.

Last week I shared with you that I have been helping my daughter with her 4-H sewing. It has been a long process, and I am happy to report that, aside from needing to be pressed again, her dress and jacket are finished.

Julia will be judged on the technical aspects of her sewing tomorrow, but last night she was judged on how she wore her outfit.

We thought she did a great job, and I guess the judge did, too.  She was champion of her division and grand champion of all of the 3rd through 7th grade contestants.  Way to go, Julia!  đꙂ

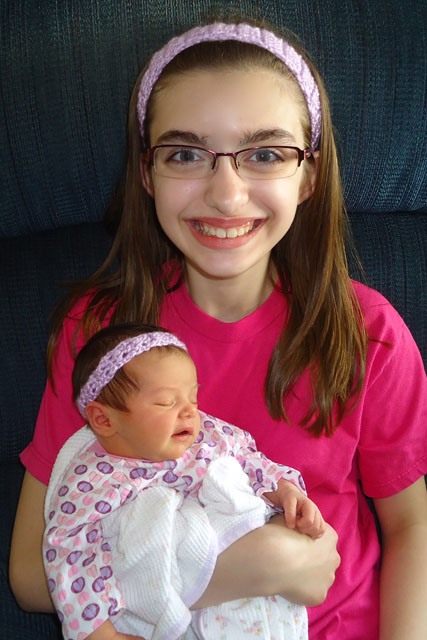
There were a few scraps left that I used to make a little skirt for Janna.  She was proud of her big sister, too.  (We are going to assume that gravity will eventually make her hair lie down.)

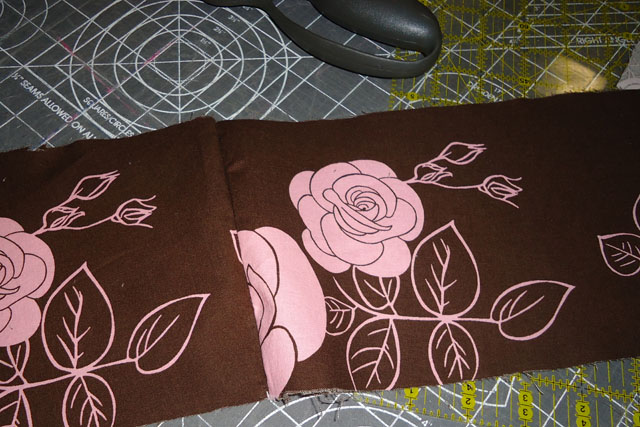
Today I will share with you how I made the baby’s skirt and headband.  I will give you instructions on how I made the skirt to fit my baby, who wears size 3-6 months in ready to wear clothes.

There wasn’t much fabric left, so I had to piece together a few scraps.  I ended up with a piece that was 28 inches x 6 inches to make a skirt for my 14 pound, 3 month old baby girl.  It worked out alright, but if I were going to make another skirt I would cut the width of the fabric no less than 8 inches.
The other materials needed to make this skirt are matching fold over elastic, a sewing machine, scissors or a rotary cutter, and matching thread.  I chose to use fold over elastic because I didn’t have enough fabric to make a casing like in my toddler girl’s skirt tutorial, and I didn’t have any coordinating fabric to make a sewn on waistband.

First, I made a narrow hem.  To make the narrow hem, I folded and pressed the fabric (along one long side) up 5/8 inch.  This means that I folded up the bottom of the fabric with wrong sides together.
Next, I tucked under the raw edge so that it met the fold and pressed it flat.  In the picture the iron is on the double folded hem and my fingers are showing you how I tucked the raw edge under.   
Ignore the seam down the middle of the fabric.  It is where I had to piece scraps together.

After I pressed the seam, I stitched the hem closed by using a 1/4 inch seam allowance.  

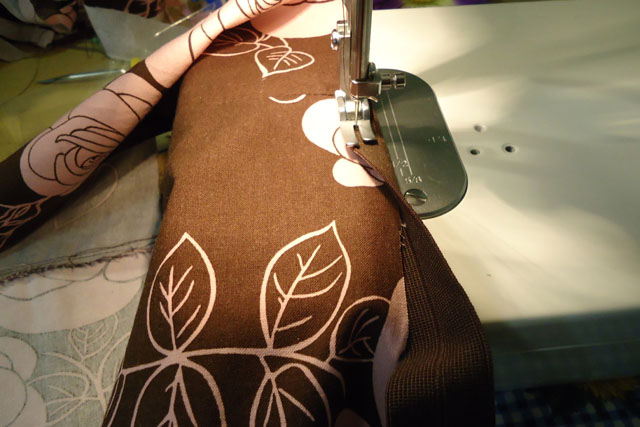
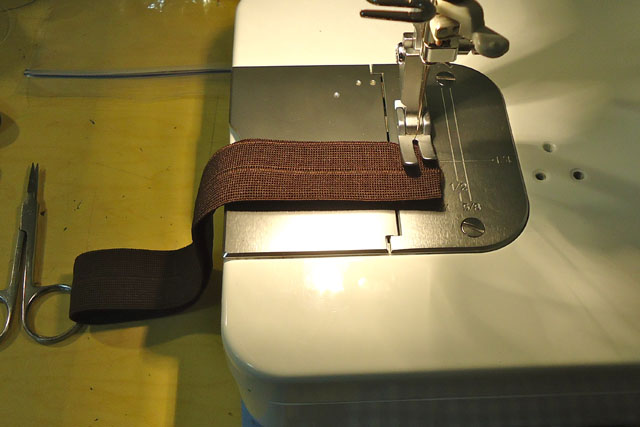
To make the waistband, I cut a 15 inch piece of fold over elastic.  First, I tucked the top of the skirt inside the elastic a couple of inches at a time.  Then, I stitched a few stitches and then backstitched in order go keep my elastic in place.

Next, I pulled the fold over elastic taut as I stitched it in place.  I only had a straight stitch machine, but a 3-step zig-zag stitch is generally what is recommended.  I kept pulling the elastic and tucking my fabric in it as I stitched the length of the fabric.
The beauty of using fold over elastic and stretching it as you sew is that it will gather the skirt fabric as you sew.  Much easier than two rows of basting stitches and all of the steps required for traditional gathering.

When I was finished sewing on the elastic, I stitched the two short ends of the skirt together with a 1/4 inch seam allowance.  I then finished the seam with another row of stitching.  However, an overcast stitch or French seam would work even better.

Viola!  That is all it took to make this little skirt that dressed up my daughter’s onesie.  I will have to play around with measurements for other sizes of skirts.  

For the headband, I used a 15 inch piece of fold over elastic.  I stitched the two short ends together, right sides together, using a 1/4 inch seam allowance.  

Then, I opened the headband up and stitched the seam down using a 1/4 inch seam allowance again.

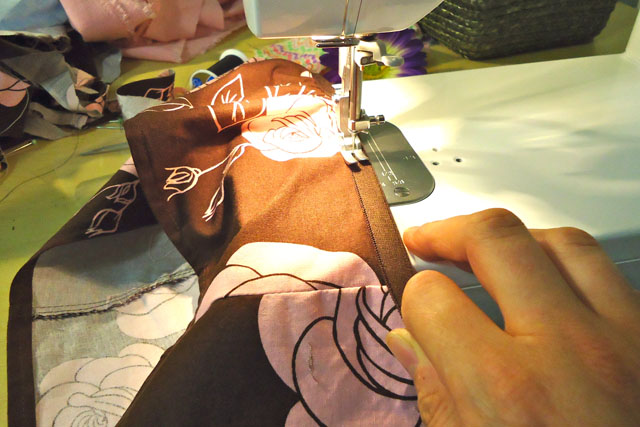
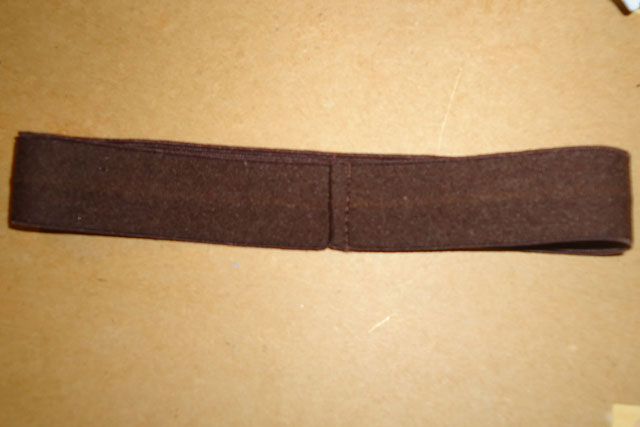
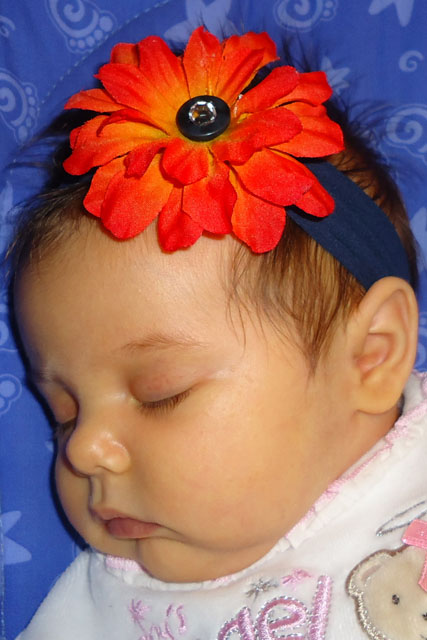
This is what the headband looked like when I was finished. The point of stitching the seam down in the second step is so the seam will lay flat and not bother the baby.

Finally, I embellished the headband by taking apart an artificial flower and gluing (with Fabri-Tac or a hot glue gun) a few of the layers back together. I glued a button to the center and called it done.

Both the skirt and the headband were quick and easy to make.  I plan on making some more in the near future.

Now it’s your turn to link up your creative posts.  I look forward to seeing all of your great ideas.  The guidelines for linking up are here.

You might also like these posts.

Fix It Up Friday: Baby Headband from Knee Highs Tutorial Baby Headband Holder Fix It Up Friday: Toddler Girls Skirt Tutorial Fix It Up Friday: Crocheted Headband Pattern

Filed Under: Crafts & DIY

« A Busy Week
Summer Bucket List: Play in the Rain »
  • Facebook
  • Google+
  • Instagram
  • Pinterest
  • RSS
  • Twitter

Subscribe for Email Updates

Popular Posts

You Are My Sunshine Footprint Art
“Tire
“Easy
“Placemat
“Cooking
“Crockpot
“Travel
“Sunday
“Sunday

Topics

Announcement

In 2014 I closed my blog Pocketful of Posies. All of the posts from Pocketful of Posies are now in the Activities for Kids category on this blog. Some of the pictures didn't transfer over, but I'm working on it.

Instagram

Pinterest

Visit Jackie's profile on Pinterest.

Facebook

Blessings Overflowing

Copyright © 2017 · Blessings Overflowing · Built on the Genesis Framework · Designed by Strong Tower Design