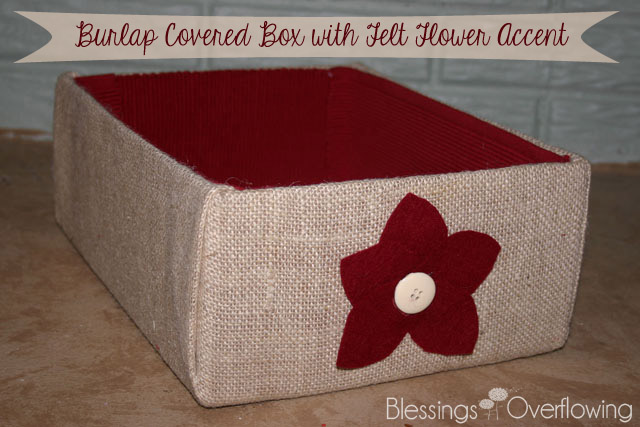
This decorative box is now residing in my kitchen and will be a great place to keep all of the papers that invariably end up strewn all over the countertops. Would you like to see what it looked like before?
I started with a plain cardboard box that I had cut the flaps off of. I measured all of the sides of the box in order to determine the amount of burlap I needed.
The box I used was 12 1/2 inches x 10 inches x 5 inches.
Next, I determined the measurements of the burlap. I added the height times 2 plus the width of each side.
For this box the measurements were 5″ + 5″ + 12 1/2″ = 22 1/2″ and 5″ + 5″ + 10″ = 20″. I added 2 1/2 inches to each measurement and cut my fabric to a size of 25 inches x 22 1/2 inches.
Then I cut a square out of each corner of the burlap. I cut 5 inch squares because that was the height of each side of my box. Then I ironed the burlap to get all of the creases out.
I heated up my hot glue gun and started gluing the burlap to the inside of my box. I started with the two short sides and made sure I pulled the burlap taught as I glued.
When it came time to glue the other two ends of burlap to the box I folded the ends in and glued them to the box. This allowed me to not have any raw edges showing.
I think this picture better shows what I am talking about. See how the raw edges aren’t exposed? I finished gluing the top ends of the burlap over the top of the box.
I didn’t have enough burlap to totally finish the inside so I glued a piece to the bottom and then cut up a placemat for the sides. If I had had more burlap I could have made a lining just like I did for the outside of the box.
I like the contrast of the red and the bottom won’t even show because I will more than likely always have papers sitting inside of the box. I suppose I cold have added ribbon to the edges of the bottom for a more finished look as well.
Next, I decided to make a felt flower to embellish the outside of the box.
I cut 5 petals from felt, but didn’t worry too much about making them perfect.
I hot glued the petals together and then glued a button to the center. Then I hot glued the flower to my box.
I am happy with the results and am looking forward to having a less cluttered kitchen counter.


Pingback: I made a box |()