Earlier this evening I posted a tutorial for a felt composition book cover. I promised I would share a tutorial for the zippered felt pouch, and here it is. Before I share the “how-to” I thought you might like to see the finished products.

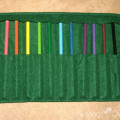
Here is a picture of all 4 of the sets I made for my older kids. They are simple yet functional. The felt book cover was designed to fit a composition book, and the zippered pouch was designed to hold pens and mechanical pencils. The pouch could easily hold crayons, too.
The pouches are just a shade small for holding a regular sized pencil, so if you want something like that I might suggest using a 9 inch zipper instead of the 7 inch one I used.
One more thing, I have always had a fear of zippers (Sewing with them, not wearing them.), but I am working on that. In an effort to make myself sew a zipper, I decided to use felt since it is cheap and easy to work with. The zippers I used have all come from yard sales and thrift stores, so if I totally messed one up it wouldn’t break the bank.

Materials needed to make a zippered felt pouch:
Felt (Acrylic, Wool or even a Felted Sweater)
7 inch Zipper
Ruler
Scissors
Rotary Cutter
Sewing Machine
Thread
First take your zipper and measure it. My 7 inch zippers were all 8 1/2 inches long. Whatever length yours is, that is the length to cut your felt. 4 1/2 inches x actual measurement of zipper (not what the package says).
Based on my zipper measurement, I cut two pieces of felt that were 4 1/2 inches x 8 1/2 inches.

Next, take one piece of felt and line it up near the teeth of the zipper. Put the left edge of your presser foot along the felt and start sewing. When you get near the zipper pull simply move it away from your presser foot.
Flip the zipper over and continue with the other piece of felt on the other side of the zipper. The picture above shows me sewing the second piece of felt to the zipper. I had already sewn the piece of felt on the left to the zipper. Basically, when you sew each piece of felt to the zipper you will have the zipper to the left and the felt to the right.
Does this make sense? Do I need to clarify? This really is an easy way to sew a zipper, I promise.

Next, pull the zipper about halfway shut. Fold the felt so that the zipper is at the top and is upside down. The zipper pull should be inside the felt and you should see the back side of the zipper.
Pin the felt pieces together.

Stitch the three felt sides using a 1/2 inch seam allowance and either a triple stitch or sew it twice with a single stitch. You want your stitching to be secure because you are making it for kids.
Trim the felt close to your stitching line. It doesn’t have to be perfect.

Flip the pouch right side out and you’re done. Now you can put crayons, pens, or other treasures in your pouch.

Here is what the zipper will look like when you are finished. I am sure I didn’t follow “the rules”, but it is functional and works. That’s what I was going for. 🙂
I think I may have conquered my fear of zippers. I am going to be trying something a little more difficult with a zipper tomorrow. I will let you know how it goes.