Showing newest 10 of 16 posts from February 2011. Show older posts

Friday, February 25, 2011

Fix It Up Friday: Potential


Good morning!  It's time for Fix It Up Friday again.  I'm so glad to have you join me.  There were some great ideas shared last week and I am looking forward to seeing what creative ideas will be linked to this week.  If you want to link up please read the guidelines here.

********************************************************************************************

This week I want to once again feature one of the projects that was linked last week.  Erika from Erika...with a K shared an antique desk makeover that I just loved.

You really need to see the before pictures to appreciate how great the desk looks now.  I never would have thought about using red but it totally works.


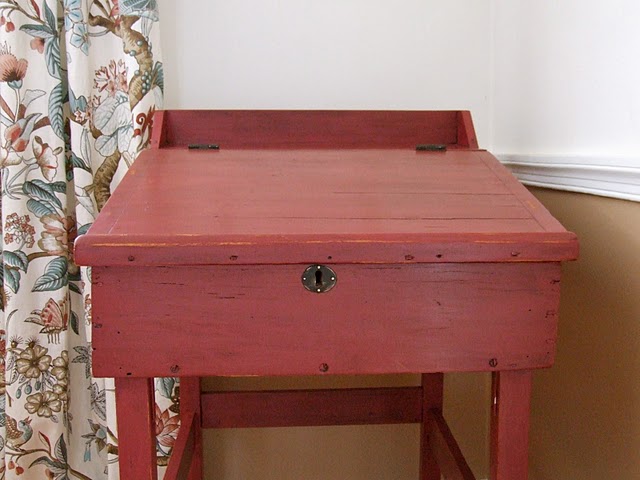
Thank you Erika...with a K for sharing this great idea. I also want to thank all of you who linked your posts last week.

*********************************************************************************************

I imagine you are wondering about the title of my post.  Potential.  In this instance I am talking about the potential of a part of my bedroom.

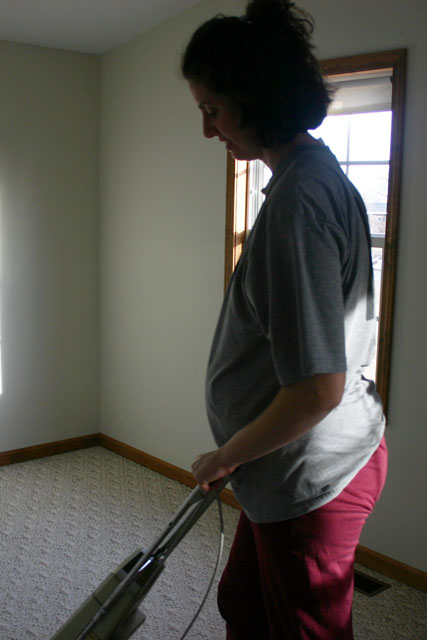
When we added on our master bedroom and bathroom five years ago there was an area in our bedroom that has housed a desk and computer. I have always called it a little office nook. It is a nice enough little space that I always thought could be used as a nursery if necessary.


Well, now is that time. With less than 8 weeks until my due date I am feeling the desire to create a special space for our baby Janna. Two weeks ago my husband helped me do a little rearranging and cleaning in our bedroom.


See what I mean about potential. I basically have a blank canvas to work with now. Over the coming weeks I hope to transform this space into Janna's "room". I have lots of ideas for projects that I hope to complete and share with you.


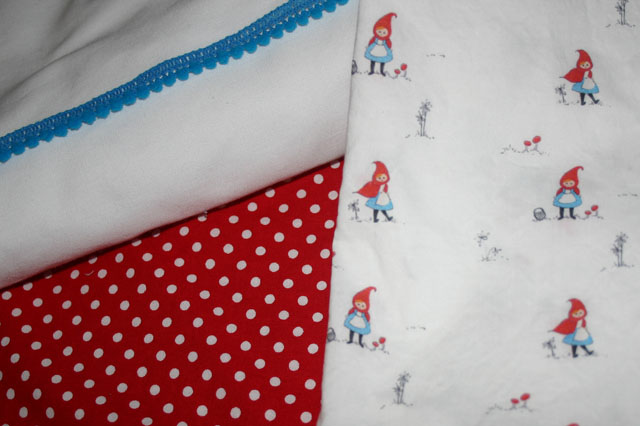
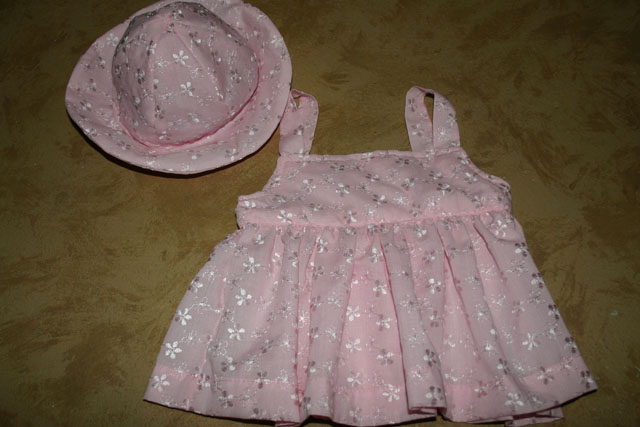
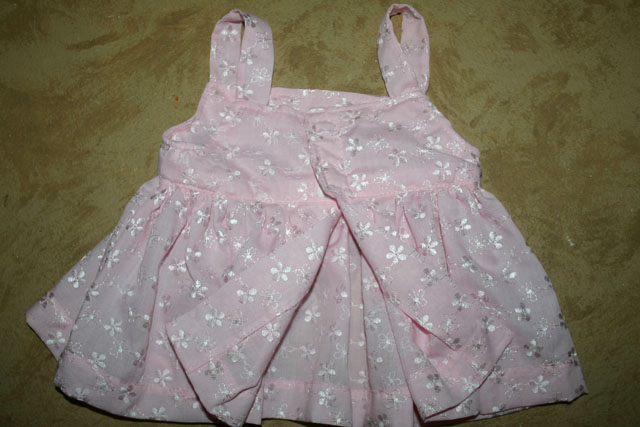
This fabric and trim has the potential to be a crib skirt and a curtain. I fell in love with the Red Riding Hood fabric that my friend Ariel designed. (Check out her Etsy shop.) I am not exactly sure how all of this is going to work together but I am excited by the possibilities and potential they have.

Sick children have prevented me from coming up with a project to share, but I am having fun thinking of the potential Janna's little "room" has and to get started. However, I am more excited to meet the little girl who will get to use the things I will make. :)

Now, it is your turn to link up your creative posts. I can't wait to be inspired by your creativity.


Share/Bookmark

Tuesday, February 22, 2011

Pregnancy Update - 32 Weeks

Today I am 32 weeks pregnant and still able to touch the floor with my legs together and not bent.

Just a little fun fact for you.  :-)

I do have to share a story about this fun fact.  On Sunday morning before church I bent down to show my husband and children how I could touch the floor without bending my knees.  I was wearing sweats and a t-shirt.

We went to my parents' house after church and I decided to show everyone there. However, this time I was wearing a dress and I heard a little pop like I was close to ripping the back of my dress.  Thankfully, the dress seems to be fine, but we all got a good chuckle over me showing off my mad skills.

Anyway, I had an appointment today with my midwife and everything looks good.  My blood pressure was good and my urine test was great.  I think the glucose in my urine two weeks ago must have been a fluke.  Janna's heart rate was in the 140's and the midwife thinks her head is low and in a good position.

The best news was that I went from having a scare 4 weeks ago that I was measuring too small to showing some growth 2 weeks ago to measuring right on track today.  I measured at 32 cm which is exactly where I should be at 32 weeks pregnant.  Yay!  I attribute this to the fact that Janna has finally started stretching out and I am feeling some kicks up high.

I am still on my cleaning frenzy and have been taking things out of rooms and totally cleaning everything from the walls to the carpets.  This house will hopefully be in tip-top shape by the time Janna arrives.  I really need to pretend I am in the last trimester of pregnancy every year.  :-)


Share/Bookmark

Monday, February 21, 2011

Blueberry Smoothie & Weekly Menu Plan

You may have noticed that I serve smoothies many nights as our fruit. This is a fun way to get more fruit into our diet. Many times I just throw things together in the blender and hope for the best. :-) However, I thought it might be nice to start writing out a few of the recipes/concoctions we make. Here is our blueberry smoothie recipe.


Blueberry Smoothie
1 Cored & Quartered Apple*
2 Cups Frozen Blueberries
1/2 Cup Yogurt
1 tsp. Cinnamon
1/2 Cup Water +
1 Tbsp. Honey

Mix all ingredients in a blender and blend on high until smooth. You may need to add more water to get the mixture to blend or to get the desired consistency.

*You may use 1 banana in place of the apple.

Now, here is our menu plan for the week.

Menu Plan

Sunday - Leftovers

Monday - Meatloaf, Mashed Potatoes, Green Beans, Fruit Smoothies

Tuesday - Tacos/Taco Salad, Refried Beans, Chips & Salsa, Carrots & Celery, Applesauce

Wednesday - Fish Fillets, Baked Potatoes, Brussels Sprouts, Fruit Smoothies

Thursday - Chicken Breasts, Butternut Squash, Broccoli, Fruit Smoothies

Friday - Chili Mac, Okra, Fruit Smoothies

Saturday - Chicken & Noodle Soup, Sandwiches, Fruit Smoothies

Before I go I wanted to share something that a friend told me in an email.  She is a new mom and said that she and her husband decided to start menu planning after seeing my menu plans each week.  I am so glad to know that something I have shared was helpful. I know that my life is easier each evening when I have taken the time to plan out a menu for the week.  Do you plan your menu each week?  How has it helped you?


Share/Bookmark

Friday, February 18, 2011

Fix It Up Friday: TV Tray Makeover


Good morning!  It's time for Fix It Up Friday again.  I'm so glad to have you join me.  There were some great ideas shared last week and I am looking forward to seeing what creative ideas will be linked to this week.  If you want to link up please read the guidelines here.

Here is a sneak peak at the project I will be sharing today.


*********************************************************************************************

I thought it might be fun to feature a post each Friday from those who submitted their creative posts the week before. Today I wanted to feature the creative dress-up center that My Creative Escapes linked up last week.


Isn't this a cute dress-up center? Would you believe that it started as an old armoire that was headed for the trash? Check out My Creative Escapes' post for more details.

Thank you My Creative Escapes for sharing this great idea. I also want to thank all of you who linked your posts last week.

*********************************************************************************************

Now, here is my Fix It Up Friday crafty submission for this week.


My husband and I purchased two of these TV trays 15 years ago when we were newlyweds. We ate many meals on them in front of the TV. Once we started having children we realized the importance of sitting at the table together without the TV.

Anyway, whenever one of the children is sick I usually pull out a tray and serve them their food in bed once they feel like eating again. The last time I used the tray I thought it could use a makeover.


I still had plenty of Krylon metallic spray paint left from last week's project so I painted the whole tray.  I could have left it as is because just painting it was a huge improvement. However, I decided not to stop there.


When the paint was dry I used Mod Podge to apply some scrapbook paper  and rick-rack to the top of the tray. I first applied Mod Podge to the tray, placed the paper on the tray, applied Mod Podge to the top, and then added the rick-rack.  I ended up applying a total of three coats of Mod Podge to the top of the tray.


Here is the finished tray. I think it will be much nicer to serve a sick little one's food on or to use as a writing desk.


I love projects like this where I can use things I already have and give them a new lease on life.  :)

Now it is your turn to link up your Fix It Up Friday posts.


Share/Bookmark

Thursday, February 17, 2011

A Dress, A Romper & More for Baby


I recently stitched up some more clothes for the baby. This time I used a sweet purple knit fabric that my daughter picked out.

The pattern I used was one that I actually won from Sew Mama Sew a few months ago. It was the Easy to Sew Baby Layette from Sew Baby.  I thought the instructions were good and that everything went together pretty easily.

I think we bought a little over a yard of fabric (the rest of the bolt) and were able to get a romper, a dress, booties and bloomers out of it in size 3-6 months.  These pieces should be comfortable for our little baby to wear this summer.

Just a little note on a modification I made to the instructions, I used snap tape wherever the pattern called for snaps.  If you aren't sure what that is here is an example.

*Don't forget that tomorrow is Fix It Up Friday.  I would love to have you link up your creative posts.  Even if you don't link up be sure to check back to see all of the great projects that are linked as well as my own Fix It Up Friday submission.


Share/Bookmark

Tuesday, February 15, 2011

Pregnancy Update - 31 Weeks

Today I am 31 weeks pregnant and still feeling good.  Oh, there are the occasional aches and pains, but they are nothing that sitting on a heating pad for a few minutes won't cure.  :-)

There isn't much new to report this week.  Janna still seems to be in about the same position.  However, I am feeling some kicks higher up than I had been.  Maybe she is going to stretch out a little more now.

I wanted to share with you how a friend blessed us last week.  I had given away almost all of the baby clothes I had been saving for years last summer.  I had decided that Janna would probably have to have a more minimalist wardrobe than the other children due to this fact.

Well, a friend sent us her daughter's baby clothes.  Janna sure won't have to be dressed in just a diaper now.


Talk about blessings overflowing! (or should I say loveseat overflowing)  Almost everything pictured is for size 0-3 months.  I was blown away by the generosity of my friend.

There were other clothes that she gave us all the way to size 18 months.  God is awesome!

I will leave you with a shot of me scrubbing the carpet in our bedroom on Saturday.  I am so thankful that I am still able to do all of the things necessary to maintain our home.


Share/Bookmark

Monday, February 14, 2011

Italian Tossed Salad Recipe & Weekly Menu Plan

My husband and I have tried to recreate a salad that someone brought to a church carry-in recently.  We like the way this salad and are calling it Italian tossed salad.  In the recipe below I have given measurements for the ingredients, but you could totally play around with the amounts you like of each item.


Italian Tossed Salad

3 Hearts of Romaine (Chopped)
5 Pepperoncinis
1/2 of a Red Onion (Sliced or Diced)
1/3 Cup Olives (Sliced)
1/2 Cup Grape Tomatoes
1 Cup Mozarella Cheese
1/4 Cup Parmesan Cheese
15 Pepperoni (Quartered)
2/3 Cup Italian Dressing

Place all of the ingredients in a large bowl and stir until everything is coated with the dressing.

Yummy!  Now, here is our weekly menu plan.

Menu Plan

Sunday - Leftovers

Monday - Hot Dogs on Buns, Corn, Applesauce

Tuesday - Spaghetti with Meat Sauce, Italian Tossed Salad, Fruit Smoothies

Wednesday - Fish Fillets, Baked Sweet Potatoes, Green Beans, Applesauce

Thursday - Baked Chicken, Macaroni & Cheese, Cooked Broccoli, Fruit Smoothies

Friday - Family Night at Church (I will take a side dish and/or dessert.)

Saturday - Crockpot Swiss Steak, Mashed Potatoes, Brussels Sprouts, Fruit Smoothies


Share/Bookmark

Saturday, February 12, 2011

Sharing Stories

Julia reading to Joseph.

When our power went out last Tuesday night we had everyone camping out in our room.  It was kind of tough to fall asleep, though.  I decided that we should tell some stories to try to fall asleep.

The boys all decided to take a turn at storytelling.  As you can imagine with three boys ranging in age from 8 to 3, there were some pretty entertaining and silly stories told.  We had quite a few laughs.

Then, my husband and I each took a turn telling stories until everyone finally settled down and fell asleep.

It was inconvenient to lose our power.

It was cold.

We ended up not even being able to stay in our own home.

However, I want to remember the stories that we told and the laughs we shared that night.  Because, power or no power, sharing stories with my family truly is a finer thing.

I am linking this post to Finer Things Friday at The Finer Things in Life.


Share/Bookmark

Friday, February 11, 2011

Fix It Up Friday: New Life for an Old Muffin Tin


Good morning!  It's time for Fix It Up Friday again.  I'm so glad to have you join me.  There were some great ideas shared last week and I am looking forward to seeing what creative ideas will be linked to this week.  If you want to link up please read the guidelines here.

Today I want to share a craft project I recently did with an old muffin tin.


This is a muffin tin I was actually still using up until a few weeks ago. I only used it with cupcake liners, but I still can't believe I actually baked with this.

I was trying to think of something creative to do with the muffin tin when an idea was born.  Why couldn't I turn it into a picture frame?


I started by spraying the front and back of the muffin tin with a flat black spray paint.


Next, I measured the size of the cups and printed some pictures in black and white onto some card stock. Then I traced a circle of the correct size and added a small magnet to the back of each picture.


I decided that the black was not quite what I wanted. So, I lightly sprayed on some Krylon metallic spray paint.  When it was dry I tied a grosgrain ribbon through the hole in the top and put the pictures in each muffin cup.

I hung my new "frame" in the kitchen and I think I like it. I was going for a sort of antique look. It kind of looks like pewter.  (I had a hard time getting a picture that accurately showed the color of the muffin tin.)  I especially like that I will be able to change the pictures when I want to.


Here is another idea for reusing a muffin tin.  This mini muffin tin makes a great jewelry organizer.  It would even be a good way to organize paper clips and other assorted office supplies.


Another idea for reusing an old muffin tin is to use it to make new crayons out of broken crayons.

Do you have any other ideas for giving new life to an old muffin tin? I would love to hear your ideas.

Now it is your turn to link up your creative posts.  I am looking forward to seeing your creative ideas.


Share/Bookmark

Thursday, February 10, 2011

Sewing Dresses & Hats for the Baby

Last week when we were at my parents' house I got a lot of patterns cut out.  When we came back home I got to work sewing.

My daughter and I had purchased a pattern and some fabric after Christmas to make the baby a dress.  We bought Simplicity #9784 because it had several options for styles and sizes.


The fabric is a sweet pink eyelet.  I made the dress using the extra small measurements (7-13 pounds).  My hopes are that it will be small enough for Janna to wear at Easter.  I guess I am assuming she won't be overdue or teeny tiny.  The hat wasn't sized for extra small so I am guessing it won't fit her right away.  That is fine though because I think she will get use out of it this summer.


This blue dress was made using the same pattern but in a size small (13-18 pounds).  The fabric is leftover from the dress my daughter is making as a practice 4-H dress.  Julia is excited to have a dress that will match her baby sister's.  I never thought we would have another girl so I am excited, too.  :-)

The pattern was pretty easy to follow except for one part.  I was glad we were at my parents' house when I started the blue dress because my mom was able to explain it to me. Being the visual person that I am, I decided to take pictures of the process and post them here.  This way I will be able to remember what I did the next time I make one of these dresses.


I first folded each edge of the skirt under (wrong sides together) 1/4 inch and stitched the seam.  


Then I folded each side over 1 1/2 inches (right sides together).  I made a mark with a pin 1 1/4 inches from the bottom of the skirt.


I stitched along that 1 1/4 inch line.


Then I cut away most of the fabric below my stitching line which left a little notch at the bottom of each side of the skirt.


I then turned the bottom of the skirt under (wrong sides together) 1/4 of an inch and then turned it another inch under (wrong sides together) to form the hem.  I stitched close to the upper edge all the way across the skirt.


Here is what the dress looked like from the back when finished.  As you can see it is open most of the way which is why finishing the edges was important.

Here is how the pattern explained it.  This was for view B.

5.  Turn skirt back extension to OUTSIDE along fold line forming facing.  Stitch across facing 1 1/4" above lower edge.  Trim facing close to stitching.  Trim garment to within 5/8 of inner edge of facing.

6.  Turn facing to inside; press, pressing up hem.  Press under 1/4" on raw edge.  Stitch hem in place starting at opening edge.

I told you I am a visual person.  Reading this had me totally boggled.  I hope that my photo instructions will make sense the next time I use the pattern.

I am linking this post to The Tattered Tag.


Share/Bookmark