Showing newest 7 of 23 posts from January 2011. Show older posts

Monday, January 31, 2011

Hot Chocolate Recipe & Weekly Menu Plan

We are expected to have an ice storm this week so I am not sure if our week will go quite as planned.  I am praying we don't lose power, but am trying to make sure I have things in order if we do.

I have planned our weekly menu with the assumption that we will have power.  If things get bad I will be adjusting it accordingly.

I have several meals that I can easily fix, and I am thankful we have a gas stove.  At least I can light the burners and heat food up if we have no power.

I do have one cooking question for you today.  Does anybody have any suggestions for cooking frozen brussels sprouts?  I am not used to eating or cooking them, but have a few packages to try out.  I would love to hear from someone who cooks them...and likes them.  :-)

After I show you my menu plan for the week I am going to post a recipe for homemade hot chocolate that my kids and I have enjoyed a few times.  It went great with the homemade marshmallows my daughter and I made at Christmas.  It looks like we will have to make some again this week.

Menu Plan 

Sunday - Leftovers
Monday - Zucchini Casserole, Cooked Broccoli, Fruit Smoothies
Tuesday - Chicken & Noodle Soup, Sandwiches, Fruit Smoothies
Wednesday - Fish Fillets, Baked Potatoes, Brussels Sprouts, Applesauce
Thursday - Beefy Noodles, Green Beans, Fruit Smoothies
Friday - Sloppy Joes on Bread, Cooked Cauliflower, Fruit Smoothies
Saturday -
Crockpot Applesauce Chicken, Mashed Potatoes, Cooked Carrots, Fruit Smoothies
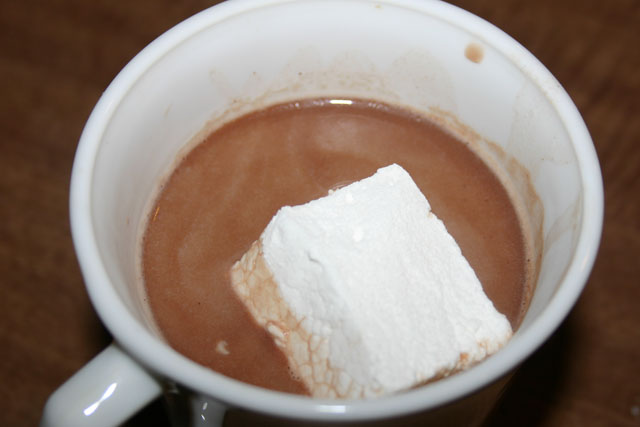

Hot Chocolate

2 Squares Unsweetened Baking Chocolate
1 Cup Water
1/8 tsp. Salt
1/3 Cup Sugar
3 Cups Milk

In a pan, melt the chocolate in the water.  Add sugar and salt and bring to a boil.  Reduce heat and simmer 3 minutes.  Add the milk and heat thoroughly, but do not boil.  Whisk or beat the hot chocolate for about a minute before serving.


Share/Bookmark

Saturday, January 29, 2011

Washcloth Lollipop Tutorial


Today I am going to share with you a tutorial for how to make a washcloth lollipop.  This will finish off my series of posts about baby showers.  If you would like to read the other baby shower posts here they are.

Punch Recipe
Baby Shower Games & Activities
Babywearing Gift Box
Baby Shower Decorating


Materials:
2 Baby Washcloths
1 Baby Spoon or Fork
Ribbon
Cellophane Bag or Plastic Baggie
Double Stick Tape
Straight Pin (optional)


Step 1:  Lay the two washcloths on top of each other with the wrong sides facing up.


Step 2:  Roll up the washcloths lengthwise.


Step 3:  Roll up the washcloths again only this time make them into a circle or tight ball.  They will kind of look like a snail's shell.  Use a straight pin (or tape) to keep the washcloths from unrolling.


Step 3:  Put some double stick tape onto the spoon and center the rolled up washcloths on it.


Step 4:  Put the cellophane bag* around the spoon and washcloth and then tie it shut with the ribbon.

*I used a sandwich bag instead of a cellophane bag.  I just cut off the excess and taped any parts down that were sticking out.


Here is a back view of the spoon and washcloth.


That's all there is to it. You can whip up several of these washcloth lollipops in no time.

Make up a bunch and then display them in a basket lined with styrofoam.

I think this made a cute centerpiece at the baby shower.  Not only that, but it was a functional gift for the new parents.

I am linking this post to Keep It Simple Sunday at The Tattered Tag.


You can now join Blessings Overflowing on Facebook.
Share/Bookmark

Friday, January 28, 2011

Fix It Up Friday: Baby Shower Decorating


Good morning!  It's time for Fix It Up Friday.  I'm so glad to have you join me.  There were several creative ideas shared last week during our link party.  If you didn't get a chance to check them out I encourage you to to do so by clicking here.  If you wish to link please read the guidelines here.

Since almost every post I have written this week has had something to do with the baby shower I helped host, today will be no exception.  (Punch Recipe; Baby Shower Games; Babywearing Gift Set)

I thought you might like to see the table decorations I made that doubled as gifts for the parents-to-be and as party favors.


One centerpiece was a hooded bath towel cake that I made using my hooded bath towel tutorial.  The cake stand was made from a yard sale cup and saucer glued together with E6000.


Another centerpiece was this basket of washcloth lollipops I made. I will be posting the tutorial for how to make these tomorrow so check back for the details.


This diaper cupcake with little pink crocheted booties on top was made using four diapers wrapped together and covered with a piece of scrapbook paper. I crocheted the little Mary Jane booties using a pattern I found in the book Crochet in No Time.  I also made another diaper cupcake for a centerpiece, but it had black Mary Jane booties on top.


When I saw the napkin dress tutorial at How Does She? last year I didn't know anyone who was pregnant, but I bookmarked it just in case.

Obviously, I got to make some for the shower and have a few hints.  First, I used luncheon napkins so that I didn't have to cut any of the napkin to make it shorter.  I also folded and cut the napkins and then set them under some heavy books for a few days.  This prevented them from wanting to open.  Finally, I hot glued little bows I made to the front which also helped keep the napkin closed.

I also wanted to tell you that the wreath pictured on the right was made by my daughter using some small artificial flowers and a grapevine wreath.  She wanted to help.  :-)


My sister-in-law wore the pacifier corsage I made using some of her wedding flowers.  I found the tutorial at A Little of This, A Little of That.


The party favors were made from empty baby food jars that a friend gave me.  I cut fabric circles and hot glued them to the lid.  Then I made labels for the outside.  Inside I put a tea light candle that smelled like baby powder.

I had so much fun getting all of these decorations ready and planning the games!  I hope that my brother and sister-in-law felt loved that day.

Be sure to check back tomorrow for my final baby shower post (I promise!) where I will show you how I made the washcloth lollipops.

Now it's your turn to link up your post.  I can't wait to see all of your creative ideas!


This linky list is now closed.


Share/Bookmark

Thursday, January 27, 2011

Babywearing Gift Box

Yesterday I posted about all of the baby shower games and activities we did at my brother and sister-in-law's baby shower.  Today I wanted to show you the babywearing gift box I made for them.

Last Friday I posted a tutorial about how to make a decorative box.  This pretty pink box was actually my first attempt.  I used a cotton floral print for the inside and outside and added an artificial flower to the front.  

This box served as a gift box for all of the slings I made for my sister-in-law.  It can also be used as decorative storage in the baby's room if they choose.  


One of the slings I made was a linen ring sling using the tutorial from Maya Wrap.  I added a decorative piece of cotton fabric at the bottom for some added detail.  I also added a small strip of fabric at the shoulder to ensure correct placement of the sling.  This piece of fabric should be at the top of the shoulder when the sling is worn.

Ring slings have been my favorite type of sling to wear over the years due to their adjustability and ease of taking on and off.

Another sling I made was a pouch sling using a piece of stretch twill.  I have meshed a few tutorials together over the years to make pouch slings, but this tutorial is a good one if you are interested in making a pouch.

Pouch slings are great options for keeping in the diaper bag because they don't take up much room when folded.  They aren't adjustable, but they are easy to take on and off.  They are good for babies of any age, but especially for a child who is walking and doesn't want to be held all of the time.  

I also made a wrap sling using the tutorial from A Load of Craft  (Here is a video demonstration of how to wear this wrap.)  I like the idea of a front panel for extra support.  When I made a wrap for myself with my last baby I just cut a 5 yard x 20 inch piece of cotton jersey and left it at that.  I think the support panel will be good for making sure the wrap is centered.

While a wrap isn't the easiest sling to put on and take off it, it is nice to have the baby's weight distributed evenly over both of your shoulders.  I do think the wrap requires the most learning curve, but it is worth trying out.

I also included a copy of the dvd Tummy 2 Tummy The Babywearing Instructional DVD.  I hope this will prove to be a useful tool for my sister-in-law and encourage her to wear her baby.

I cannot say enough good things about babywearing and hope that the babywearing gift box I gave my sister-in-law will be helpful to her.  Just being able to have your hands free while still holding your baby can mean so much when you have a newborn.  I also enjoy being able to wear my toddlers when we are out and about.

Do you wear your babies in a sling?  Which type of carrier is your favorite?

*Don't forget that tomorrow is Fix It Up Friday.  I love seeing all of the creative posts that are shared!  I hope you will join us.

I am linking this post to:
Strut Your Stuff Thursday at Somewhat Simple

Share/Bookmark

Wednesday, January 26, 2011

Baby Shower Games & Activities

On Saturday I helped host a baby shower for my brother and sister-in-law who are due with their first child on February 19th.  It was a lot of fun and I was so excited to be able to help.

When guests arrived I gave them each a blank envelope and asked them to write their name and address on it.  By having the guests address their own envelope all that my sister-in-law will have to do is write out the thank you cards.

I also gave each guest a piece of paper and asked them to write down their guesses as to when they think the baby will be born and how big she will be.  They could also write down any advice for the parents-to-be.

The final thing I had each guest do while we were waiting on everyone to arrive was to cut a length of ribbon to the size they thought my sister-in-law was around her belly.  They wrote their names on the ribbon so that the winner could receive a prize,

Once everyone arrived we went around the room and shared our guesses for the baby's statistics.  It was a good ice breaker and allowed everyone the chance to introduce themselves as well.


After that it was time to have my brother wrap the ribbons around my sister-in-law's belly.  It was quite comical to see some of the guesses people made as to my sister-in-law's girth.  The winner was actually absolutely accurate and I don't know that she has ever even hugged my sister-in-law.


Next, I surprised my brother with a baby diapering game.  I asked him to diaper a baby doll and timed him. After starting to put the diaper on backwards he finished in 32 seconds despite my sound effects and distractions.

To make it more interesting I then blindfolded him and asked him to do it again.  I told him this would simulate night time changes.  Would you believe that he diapered the doll in 21 seconds?  I think I should have given him a new diaper instead of the one he had just used to make it more challenging.

Anyway, he was a good sport and all of the guests enjoyed watching him in action.


Our final activity before eating and opening presents was a craft activity.  Imagine me wanting to have everyone do something crafty.  :-)

Each guest got either a onesie (in various sizes), a bib, or a cloth diaper to be used as a burp cloth.  They used fabric markers and/or fabric paints.


The guests really seemed to enjoy decorating the items for the baby.  There were some very creative ideas.  My brother and sister-in-law chose a winner when everyone was finished.


I hung all of the items on some twine with clothespins to serve two purposes.  First, everything could dry without being disturbed.  Secondly, they served as decorations for two blank walls.

I had a lot of fun and loved being MC for the shower.  Tomorrow I will share about the gifts I made for the shower and on Friday I will share about the table decorations I made.


Share/Bookmark

Tuesday, January 25, 2011

Pregnancy Update - 28 Weeks

Today I had my 28 week appointment with my midwife.  I first had to have my blood drawn and drink the dreaded orange glucose test drink.  I have found that drinking it quickly works best for me.  However, those last few swallows really are tough to get down on an empty stomach.

I then had my regular checkup.  I have gained 6 pounds since my last visit putting my total weight gain at 22 pounds according to my midwife.  My blood pressure was good, my urine tests were good, Janna's heart rate was 148 and she was moving around.

Everything looked good except for the fact that the top of my uterus is measuring below where it should be for this point in the pregnancy.  My midwife has ordered an ultrasound for Thursday to be sure that there isn't anything wrong.

I believe that Janna is lying horizontally and this is more than likely why my uterus isn't stretched to where it should be.  I mostly feel her kicking at my sides and have rarely felt her kicking up high.  My midwife agrees with me but wants to err on the side of caution.

I have done enough reading and research over the years to know all of the other things that could cause my uterus to be measuring small.  Low amniotic fluid, intrauterine growth restriction, placental problems and more could also be the cause.

However, I am choosing to think positively and pray that none of those are the case.  I measured small with Joshua and had an ultrasound at 28 weeks because the doctor was concerned about how small I was measuring.  It turned out that Joshua measured just right according to the ultrasound. If it happened once I am sure it can happen again.

Even so, I would love to have your prayers for baby Janna and my pregnancy.  Thank you so much!


Share/Bookmark

Monday, January 24, 2011

Punch Recipe & Weekly Menu Plan

On Saturday I got to help host a baby shower for my brother and sister-in-law.  It was a lot of fun and I will probably be posting something about the shower every day this week.

Today I will be sharing the recipe I used to make the punch for the shower.  It is my mom's recipe and is always yummy.  Plus, you can make it ahead and it needs no ice.  Bonus!

Before I get to the recipe I want to share my menu plan for this week.  It was so nice to have my menu planned last week.  The most stressful part of cooking, for me, is deciding what to cook.  I am looking forward to being able to just focus on cooking the meals again this week.

Menu Plan
  • Sunday -  Leftovers
  • Monday - Smoked Sausage, Fried Potatoes, Green Beans, Fruit Smoothies
  • Tuesday - Tacos/Taco Salad, Carrot & Celery Sticks, Chips & Salsa, Applesauce
  • Wednesday - Fish Fillets, Baked Sweet Potatoes, Cooked Broccoli, Fruit Smoothies
  • Thursday - Swiss Steak, Mashed Potatoes, Cooked Cauliflower, Fruit Smoothies
  • Friday - Spaghetti with Meat Sauce, Salad, Baked Apples
  • Saturday - Ham & Bean Soup (Crockpot), Cornbread, Fruit Smoothies
Now, here is the punch recipe.


Punch

1 Cup Sugar
1 Cup Boiling Water
1 Small Package Jello (Whatever color you want the punch.)
1 Large Can Unsweetened Pineapple Juice
1 Small Can Frozen Lemonade
4 1/2 Cups Water

Mix together sugar and boiling water.  Add remaining ingredients.  Mix well.  Freeze in 1/2 gallon containers.  Remove from freezer at least 4 hours before serving.  Looks like slush and needs no ice.


Share/Bookmark