Friday, August 20, 2010

Sending My Children to School

I don't often discuss the fact that my children go to public school.  Sometimes I feel guilty that I am staying home to be with my children yet, once they are of school age, they are gone from me during the day.

As a former public school teacher and wife to a teacher I know all about the pros and cons of school.  Yet, I have had to make peace with our decision.  I am not saying I am one of those moms who relishes the start of school.  I miss my children terribly when they are gone.

This year all three of my older children are attending school, and people have said how nice it will be just to have one child at home all day.  Don't get me wrong, I enjoy my little guy, but this week has been so quiet around here.  I have to admit that I have had a hard time adjusting to the older kids being gone. Once we get back into the routine I know things will be fine.  It is the getting to that point that is hard.

It can be hard to be a Christian parent trying to teach Christian values to my children while they are gone from me at school.  However, I am here to say that they are learning so much about how to put what we have taught them into practice. 


Take my 11 year old daughter Julia (a 6th grader this year) for example.  On her first day of Kindergarten she was asked by her teacher to play with a little boy who was having some trouble adjusting.  She ended up being a big help with him all year.  There were times when the only person who could get him to respond appropriately was my daughter.  That was a big responsibiliy for a little girl, but she did it with a smile.

When she was in third grade a dear friend had moved away.  She didn't know who to play with and would sometimes play by herself.  I worried about her, but she said she was fine because she liked herself.  She also said that some of the kids were playing things that she didn't think were appropriate, so she thought it was better to play by herself.

Julia has always been well-liked by both her teachers and the other children.  She always treats everyone with kindness.  She befriends the girls that aren't popular instead of trying to be popular herself. 


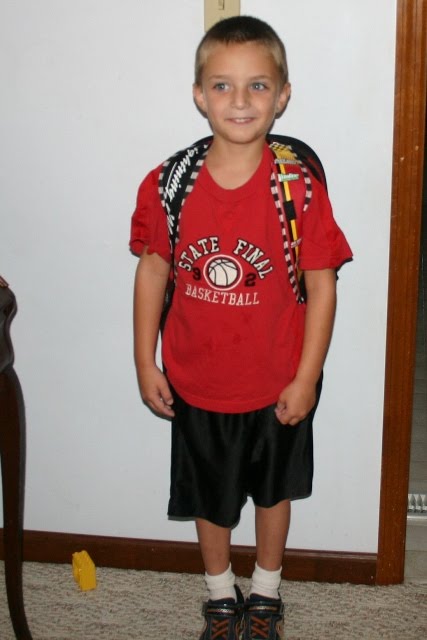
My almost 8 year old son James is in 2nd grade this year.  He is such a good student and a well-behaved boy at school.  He comes up with some of the most thought-provoking questions.  He is a perfectionist and a worrier, but we are praying that he can overcome those traits that I am sure I have passed onto him unknowingly.  His bedtime prayer last night was so heartfelt and sweet.  He knows that God can help him through anything.

When James was in Kindergarten he would come home and ask me why the kids didn't always behave.  That was really his first experience with a large group of children his own age.  His observations have prompted many great discussions over the years about how and why he should choose to do the right thing.  He has daily been able to practice making the right decisions even when others might try to persuade him otherwise.


This little guy, while only having been in school for four days, has been learning a lot about following the rules and following directions.  I am praying that Joshua will blossom and grow into the boy I know he can be.  This first week hasn't been easy for him, but he is doing better each day.


Joseph still has three more years with me.  Like I said, it has been quiet, but we are adjusting, too.  Who wouldn't have fun with a boy who has a smile like that?

These four lives that God has entrusted my husband and I with are an awesome responsibility that we don't take lightly.  Just because they go to public school doesn't mean that our job is over.  In fact, our job is even harder because we aren't in control of every aspect of their daily lives.

We have to rely on God to not only protect our children while they are at school, but to give us the wisdom to help them know God and follow His path for them every day. 

I am linking this post to Finer Things Friday at The Finer Things in Life.


Share/Bookmark

Tuesday, August 17, 2010


Yesterday my three oldest children started 6th grade, 2nd grade and Kindergarten.  The house has seemed so quiet with just my 2 1/2 year old and I here. I am praying that they, and my husband who is a teacher, have a wonderful school year.  It is always hard for me to let them go. Yet, I know that God is always with them, even when I am not. 

I think I will take a couple of days off in order to adjust to our new schedule.  I will be back soon.


Share/Bookmark

Thursday, August 12, 2010

Netting Dish Scratcher Tutorial

My grandma always used to make a dozen dish "scratchers" from netting for each of her daughters every Christmas.  It was a tradition that we haven't kept up with even though the scratchers aren't hard to make and we all love using them to wash our dishes.


When we stayed with my aunt and uncle last month I made my aunt some red scratchers.  I also made myself the blue scratchers pictured above.  Considering you can often purchase a yard of netting for less than a dollar, these scratchers are very frugal to make. 


To make 7 scratchers of your own you will need 1 yard of netting (It is rougher than tulle.), some scissors, a ruler, and rubberbands.  My grandma always used a needle and thread to sew the scratchers together.  However, I figured out a couple of years ago that I could use a rubberband instead of hand sewing each scratcher.


Fold the netting into eights and cut it into 5 inch pieces.  You should end up with 14 pieces of netting at this point. 


Take 2 pieces of netting, unfold them and line them up evenly. 


Start accordian folding the netting until you have something that looks like this in your hand.


Take a rubberband and wrap it around the center of your netting until you can't wrap it any more.


Pull the two layers apart so that your scratcher starts to pouf.  If you have any parts of your scratcher that stick out too much you can trim them up with your scissors.  Of course, they don't have to be perfect because you are just going to wash dishes with them.

Now you are ready to wash some dishes with your new scratchers.  Have fun!

I am linking this post to:
Strut Your Stuff Thursday at Somewhat Simple
Show of Your Stuff Party at Fireflies & Jellybeans


Be sure to check out my other crafty posts from this week.  More Frugal Kitchen Decor & Lunch Bag Sewing


Share/Bookmark

Wednesday, August 11, 2010

Lunch Bag Sewing

My daughter asked me to make her a lunch box for school this year.  I set out to find a free tutorial online and chose one from A Lemon Squeezy Home.


I didn't have any bias tape that matched the fabric my daughter chose from my stash, so I chose the turned and topstitched method from the tutorial.  It turned out well, but we decided that it wasn't going to be big enough to hold everything.  The lunch sack is a similar size to a paper lunch sack, but I wasn't thinking about the size when I made it.

So, I searched for another tutorial and found one at Blissful


The denim at the bottom came from an old pair of blue jeans, and the floral was leftover from my daughter's 4-H dress.  I lined the bag with some fabric that was left from the first lunch box in this post.  For the strap I used one of the side seams from the old jeans I used for the bottom of the bag.

The bag was closer to what I was going for, but the width wasn't quite what I was hoping it would be.  So, I decided to try one more tutorial.  I chose the lunch bag tutorial from The Long Thread


I used a pair of jeans (I opened up the leg first and then cut the piece to size.) for the outer fabric, and some floral scrap fabric for the lining and sides of the bag.  I think the bag would have worked better if I had used canvas and coated cotton like the tutorial called for, but I was using materials I already had.


To help the bag's bottom be more stable, I covered a piece of cardboard with duct tape.  I had to make the handles a little shorter because I only had a 20 inch piece in my stash.  The tutorial calls for a magnetic snap which I actually already had.

I think it is safe to say that I am tired of sewing lunch bags.  My daughter isn't picky, and probably would have been happy with either of the first two bags.  However, I was searching for a bag that would be big enough, and I think this last lunch bag will do the trick.  Here's hoping my daughter enjoys many fabulous lunches with her new lunch bag.


Share/Bookmark

Monday, August 9, 2010

More Frugal Kitchen Decor

A couple of weeks ago I posted a few ideas of how I was trying to frugally redecorate my kitchen.  I have been having fun coming up with ways to use what I have lying around the house to decorate my freshly painted walls. 

Our big project is so close to being finished, but I want to wait until we are totally done before I share the entire room with you. 

Anyway, I did want to share two projects with you.  The first was inspired by this post.  I started with a frame I have had for years and a fork, knife and spoon that my parents left here when they moved.


Thanks to a little spray paint, hot gluing a placemat to the backing board of the frame, and hot gluing the sliverware to the placemat I was able to create this artwork.


I think it turned out pretty cool.  Also, what is up with me and placemats?  I seem to be using them in all sorts of projects, but never for their intended use. 


I purchased these decorative pans at a yard sale last year for 75 cents for all four of them.  Two of them were more shallow and brighter.  I thought they would be cool in my kitchen, but for the past year never did anything with them.


Thanks to the same can of white spray paint I used in the project above they are now flanking my 75 cent yard sale foil/waxed paper/plastic wrap/paper towel rack.  Part of me thought that I should have painted the rack, but I decided that might make it the focus instead of the decorative pans.

So what have we learned about frugal decor today?  Spray paint is our friend and so are yard sales, place mats, and old silverware.  :-)

Have a great day!

Share/Bookmark

Thursday, August 5, 2010

Washer Necklaces and More


I just realized that I never posted about the washer necklaces I made in June.  I followed the tutorial I found at Little Birdie Secrets

Basically, I used some metal washers I found at a hardware store, some scrapbook paper scraps, glue, a glaze and some cording.

I couldn't find the "Diamond Glaze" the tutorial called for, but purchased what I could find at our local JoAnn Fabrics store.  I think it did alright except for the fact that a few of the papers faded.


I think they will make nice pattern weights.  :-)

The necklaces are going to be Christmas gifts.  I hope I remember to keep one for myself.  I have a bad habit of making a bunch of something and then giving them all away.

I also forgot to post about the little pillowcase dresses I helped my sister-in-law make for her niece back in June.  We used this pattern that I had purchased several years ago.  I am sure you can find a free tutorial if you want to make one yourself.  She did almost all of the sewing.  My job was to get everything ready for her to sew.  I think they turned out cute.


I am proud of my sister-in-law for wanting to learn to sew and was thrilled that she let me help her.


Out of some of the scraps I made her niece a fabric covered headband using the tutorial I found at Calico.  I used a long running stitch along each side to finish off the headband before I attached the fabric to the plastic headband.

Seeing those cute little dresses makes me want to sew.  I better get some of my irons out of the fire so I can get to it.  Have a great day.

I am linking this post to:
Strut Your Stuff Thursday at Somewhat Simple
Favorite Things Friday at A Few of My Favorite Things
Friday Fun Finds at KoJo Designs
Handmade Christmas at Proverbs 31 Living


Share/Bookmark

Wednesday, August 4, 2010

How to Skin a Tomato

I know you are all just dying to know this information.  :-)  If you are going to preserve crushed, quartered, or whole tomatoes by canning them you will want to have the skins removed.  I learned this the hard way one year. 

I had canned some crushed tomatoes, and when I went to use them I had bits of tomato skins floating all over my pan.  After picking them out I realized the value of skinning the tomatoes first. 

Here is how you can easily accomplish this task.


First, wash your tomatoes, and boil some water in a large pot.  Once the water has started to boil, you can place a few tomatoes at a time into the pot.  Take them out when you notice the skins starting to split.  This only takes a few minutes.


Take the tomatoes out of the pot with a slotted spoon and place them into a bowl of cold water.  Notice how the skins are already starting to slip off of the tomato.


Take the tomatoes out of the water and take the skins off.  This should be able to be accomplished with just your fingers.  Next, you can either can the tomatoes whole, quarter them or dice them. 

See, that wasn't so hard.  Trust me, this is a step you don't want to skip when you are canning tomatoes. 


Share/Bookmark

Tuesday, August 3, 2010

July Decluttering and Giving Totals

The month of July seemed to fly by with 4-H projects, a vacation, gardening and a big kitchen project.  Decluttering took a back seat to all of those activities. 

Quite frankly, if you walked into my basement right now you might think a tornado hit.  You might never believe that I spent the first 6 months of the year giving away a total of 1510 items. 

January 2010
February 2010
March 2010
April 2010
May 2010
June 2010

However, I just tallied up everything I gave away in July and was surprised that my total was actually 89.  I really couldn't tell you what I even gave to the Goodwill.  I know I ended up taking two trash bags full, but didn't write down what any of it was.

So, in spite of not spending much time decluttering this month my yearly total is now up to 1599 items.  I hope to do better this month. 

Did you do any decluttering last month?  Do you have any tips to share on how to keep the clutter down in your home?  I would love to hear from you.

I am linking this post to Amy's Declutter Challenge at The Finer Things in Life.

Share/Bookmark

Monday, August 2, 2010

Garden Update and How to Freeze Corn

I didn't exactly intend to take a week and a half break from blogging, but my kitchen re-do had to take precedence.  I am not quite ready to show you everything I did, but I will soon.  Let's just say that I saw 2:00 a.m. more times than I hope to in the near future. 

Anyway, in addition to all of the painting and stripping of wallpaper, my garden has been producing a harvest that has needed preserving. 


My garden is looking rather sad in this picture, but it has been giving us some wonderful vegetables.  My mom helped me pick the last of my green beans on Friday.  I have canned a total of 42 quarts and have frozen 3 1/2 gallons of green beans.  I am very pleased with our green bean harvest. 

The zucchini plants finally fizzled out and the last of the cucumbers won't be far behind.  My tomato plants are not doing very well this year and I am not sure why.  My husband's step-mom has been sharing her bountiful harvest and for that I am thankful.


We picked a total of 24 butternut squash and will probably have another 8 or 9 when all is said and done. 


Last week we picked the last of our corn.  We had a really good harvest with a total of 14 dozen ears of corn.  We have been enjoying lots of corn-on-the-cob, and I have frozen quite a bit.


Last year was the first year I tried freezing corn in a slightly different manner than in years past.  I used to wash, boil, and then cool the ears before cutting the corn off of them.  However, this new method is much easier.

Simply wash each ear of corn and then cut the corn off of it.  I use an electric knife and an angel food cake pan (or bundt pan). 


Then I place the corn into a large pan and cover with water.  I boil it for at least five minutes. Next, I drain the corn in a colander and run some cold water over it. 


I put it in 2 cup increments in zip-top baggies and put it in the freezer.  I had a total of 30 bags which meant I froze 60 cups of corn. 

I am still hoping to get some more tomatoes out of the garden as well as green peppers and sweet potatoes. Even though the garden is a lot of hard work and I am no expert at it, it is still a wonderful blessing when the produce is ready.

Do you have a garden?  How have your harvests been?


Share/Bookmark