Thursday, December 31, 2009

Happy New Year!

It is hard to believe that 2009 is almost at an end.  We have seen God bless us in so many ways this year.  I can't even begin to list all of His blessings, but let me just say that they were overflowing.

I am looking forward to what 2010 will bring.  I have been working on my to-do list and setting some goals.  If all goes well I will try to post my list in the next few days so that maybe those of you reading this will help keep me accountable.  :-)

You may notice that I have changed my blog layout again.  I have felt the need to make this space have a more simple look.  I am still playing around with the layout, but hope to get it to look the way I want soon.

I rarely post without pictures, so I thought I would do something fun. Below is the first picture in my January folder and the last picture in my December folder. 

January 2009-My husband using a tape measure to confirm we got 10 inches of snow.


December 2009-James under his bed after we cleaned it out to make a "secret" getaway.


Take care.  I pray that God's blessings will be poured out on you in 2010.


Share/Bookmark

Tuesday, December 29, 2009

Final Homemade Christmas 2009 Post

Today is my last homemade Christmas post for this year.  If you want to see the entire list then click here.   I have to say that I am pleased with the responses my homemade creations received.  Scarves and hats have been worn as well as pants and skirts, toys have been played with, and pictures have been hung. 


I made two rice heat therapy bags for my son's teacher and her assistant.  I always make an inner bag of cotton fabric which holds the rice.  Then I made the outer bag of fleece.  I attached a tag with instructions and a poem I wrote.


Your students are sweet,
Of course, this is true.
But sometimes they might,
Cause you a pain or two.


So, if this is the case,
This bag you should heat.
And allow its warmth,
To give you a treat.
         By Jackie  


I also made some small fleece rice and flax seed bags for some children (Boo Boo Bags) and friends (Headache Helpers).  These bags have a final measurement of 3" x 8".  They can be heated in the microwave or put in the freezer.  I again made an inner bag to hold the rice and flax and then used fleece for the outside.


I spent some time this past fall taking pictures of various items inside and outside of our home to make some name pictures.  I had seen some on various sites on the web, but could not justify the cost.  So, I made some myself.  I am happy with the way they turned out and hope the recipients appreciated them.  I would like to make some for my children this year using their first names.  


I posted on my preschool blog yesterday all of the details of how this footprint art was made.  Check it out.


Our church has a homemade Christmas card exchange, and my older two children and I have participated for the last few years.  I drew my brother's name, so I used a picture I had taken of him and his wife.  (No editing was used to make the picture.)  I used a piece of wood and applied a black and white copy of the picture using Mod Podge.  I used two coats to seal the top and added a piece of yarn through the hole at the top.


My daughter made a Christmas mouse using some instructions we found at Family Fun.


My son made a card and then tied three candy canes together to act as a card holder.


Using the same technique as the ornament I made for my brother I made three ornaments using our family picture.  One for us and two for the grandparents.


My brother surprised me with his craftiness by making me this sign.  It is made from a thin piece of Styrofoam.  He glued letters to the front and then used gray spray paint that had something in it like acetone.  (I will have to ask him again.)  The paint caused the Styrofoam to shrink, and made the letters look raised. (Once the paper letters were taken off.)   At first it looked like stone, but when I picked it up I realized how light it was.  Pretty creative brother, huh? 


This giant ornament was created by my mom with minimal help from my oldest two children and I.  One Sunday after Thanksgiving we blew up some balloons and used watered down glue to apply a few layers of newspaper strips.  Once they were dry my mom applied paper mache and let it dry.  Then she cut a hole in the middle and spray painted the outside.  We used spray glue to attach aluminum foil to the inside.  We attached a single Christmas light to the top along with a wire for hanging and a bow.  Some polyester stuffing was used to look like snow and then a figurine we have had for several years completed the large ornament.  This project was found in a book my mom has had since the 1970's.  It was fun.  Thanks, Mom!

We had a great Christmas and I feel so blessed.  Being with family and friends is more important than any of the gifts we received.  We are thankful for the presents we got, but we were happy to just be together.  Thanks for joining me on this handmade Christmas journey.  I have some ideas already in mind for next year.  :-)


Share/Bookmark

Thursday, December 24, 2009

Merry Christmas!


May you and your family have a blessed Christmas.
(Picture taken November 2009.)


Share/Bookmark

Wednesday, December 23, 2009

14 years ago I said, "I do."

It is hard to believe that my husband and I could be celebrating our fourteenth wedding anniversary today.  I remember December 23, 1995 so well that I often can't believe it could have been so long ago.


I was 21 years old and had planned for that cold December day for almost an entire year.  Countless hours were spent during 1995 planning for the moment we would say, "I do."  The flowers, the dress, the cake, the decorations, the invitations, and countless other little details were what filled my free time.


I also spent many hours with this 22 year old who would become my husband that day. 


At 3:30 p.m. fourteen years ago I walked down a long aisle holding onto my father's arm while Pachabel's Canon in D played in the background.  That day we stood in front of a church full of our family and friends and proclaimed that we wanted to be married and spend the rest of our lives together. 

We were young and starry-eyed on the day we said, "I do."  We had no idea what our lives would be like after fourteen years of marriage.  We just knew we wanted to be together.

Only God knows what the next fourteen years will hold, but I know I want to spend them with the man to whom I said, "I do."
Share/Bookmark

Thursday, December 17, 2009

Felt Sword & Shield

Family Update: Joshua (child #3) had a lot of difficulty breathing when he woke up yesterday morning. After two nebulizer treatments and a steamy bathroom did nothing to help, and the fact that his chest was retracting and he was wheezing, I took him to the ER. After spending 4 hours there, having chest and esophagus x-rays, an oral steroid, a special breathing treatment with epinephrine, and a shot of Rosefin he was good enough to come home with a diagnosis of croup. We are no strangers to this diagnosis for our older two sons. James was hospitalized for 2 days at 13 months with severe croup. While I am usually a naturally-minded person, when it comes to a situation where my child is unable to breath without gasping I am thankful for conventional medicine. Today, Joshua has a cough, but it is manageable. I am praising God that he is better. He has even been using a stethoscope to listen to my heart and talking a lot about what happened yesterday.

I am concerned today about my oldest son James (child #2). He had some pain in his upper right thigh last night, but didn't complain too much. Today he has been limping and complaining of pain. I am hopeful it is just a sore muscle that will heal in the next day or two. He doesn't have a very high pain threshold, so I would imagine if I asked him what his pain level was out of 10 he would say 11. It is hard to see my children hurt or sick. I am praying everyone can be healthy and feel good for next week.


Today I am once again joining Sarah of The Fifth Street Palace and Abbi of Proverbs 31 Living for another Thursday of sharing a homemade Christmas project.


I recently made these felt sword/knife and shield sets for my oldest two boys. They were fairly quick to sew and were made using felt I have had for a long time and some plastic canvas (needlepoint) that I had been given. I thought about making capes as well, but I don't know that I will have time to make them. I will see. My "knights" might just have to defend our "castle" without capes. :-)

To make the sword I drew a knife-like shape on a piece of paper. Then I traced it onto felt and cut two pieces. I also cut a piece of plastic canvas in the same shape, but made it about 1/4" smaller all the way around. I made a sandwich of felt, canvas and felt and then used a zig-zag stitch to sew everything together. I also cut a rectangle of plastic canvas and 2 from a contrasting color of felt that were 1/4" larger all the way around. To sew these pieces to the knife I put one felt rectangle down, placed the knife on top, the plastic canvas on top of the knife and then the other felt rectangle on top of it and stitched around with a zig-zag stitch.

For the shield I cut two circles of felt and one a 1/4" smaller from plastic canvas. I also cut a rectangle of felt to act as the handle and a felt letter for the front. (Obviously, "J" is the first letter of my boys' names.) I first stitched the handle to the back of one felt circle, and stitched the letter to the middle of the other felt circle. Then I again made a sandwich of felt, plastic canvas and felt and used a zig-zag stitch to sew everything together.

The sword and shield will not be able to hurt anyone because the plastic canvas will bend easily. It is mainly to hold the shape and give a little stability, but not cause any harm. I definitely don't want my little "knights" to have any bloody battles while they are rescuing damsels or defending their family. :-)

I have several really neat gifts that I have made that I would love to share, but there are a few people who read this blog that might be receiving these gifts. I want them to be surprised. So, sometime after Christmas I will have some cool ideas to post.
Share/Bookmark

Monday, December 14, 2009

Christmas Rag Wreaths

On Saturday my daughter and I did some crafting. I am so blessed to have a daughter who loves all things crafty. I love my boys so much, but there is something special about having a little girl to do things with.


Anyway, we made four rag wreaths using Christmas fabric that had been given to us by a neighbor of my parents. I used my rotary cutter and cut a lot of fabric into 2" x 8" strips. I am really glad I did this prep work because it made our craft time more enjoyable.


To make a rag wreath you simply need a wire hanger and some strips of fabric (Like I said I cut my strips 2" x 8".) Bend the hanger into a circle. (The hook part is a built in hanger for the wreath.) Then, tie on your strips using a single knot.


Once you have as many strips as you want on your wreath just fluff them up and they are ready to hang. We had a great time with this frugal craft!

Here are some links to other rag wreaths my daughter and I have made.

Valentine's Rag Wreath

Easter Rag Wreath
Floral Rag Wreath
Share/Bookmark

Thursday, December 10, 2009

Felt Lego Case and More


Today I am once again joining Sarah of The Fifth Street Palace and Abbi of Proverbs 31 Living for another Thursday of sharing some homemade Christmas projects.

The first project I want to share with you is something I made for my oldest son. It was one of those projects where you just kind of fly by the seat of your pants and hope for the best.


I basically made a little felt box with a handle. I used plastic canvas (think needlepoint) to make it sturdy. I think if I were to make one again I would use felt to cover the Velcro tabs, but like I said I was just running with an idea.


Inside the box I glued two pieces of Lego board to act as a play surface for my son to use with some of his Legos. I was able to cut the Lego board with scissors which was a pleasant surprise.


As you can see it unfolds even more. It is relatively small, but it can hold several Legos. I had all of the supplies for this project already, so I didn't have to purchase anything to make it. I am hopeful that my son will like this frugal gift. I do have lots of chicken scratch notes, so if I ever want to undertake this project again I might be able to.


I also finished two more reading pillows last weekend. My daughter helped me stuff them, and commented how she would love one just like it. She grabbed a book and tested one of the pillows to see how it would work. She said that maybe this winter, when I am not too busy, she could help me make one for her to use. How sweet she is! She is going to be so excited Christmas morning when she finds out that I already made one for her.


This little bag was supposed to look like the one in the tutorial I followed from Fishsticks and Fries. I was feeling pretty good about the zipper, but then totally messed up the corners. I clipped them after sewing without checking to see how it looked first. How do you fix a pretty major mistake? Make some more cuts so the bottom of the bag is curved. Total disaster avoided, and I have a functional little bag. I intend to try Bonnie's tutorial again when I get some more zippers.

Finally, if you would like some dough ornament recipes then check out the links below from my preschool blog.

Salt Dough Ornaments
Cinnamon Ornaments
Sparkling Dough Ornaments

I will be bustling around trying to finish gifts and get everything wrapped during the next 15 days all the while trying to enjoy this beautiful season with my family. If I don't post as much you will know why. Take care.
Share/Bookmark

Tuesday, December 8, 2009

Eleven Years Ago Tonight


Eleven years ago tonight I found out I was going to be a mother. My life was forever forever changed the moment I saw two lines.

I had never taken a pregnancy test before, but just had a feeling that I was pregnant. I went to buy a test after work because I had felt slightly nauseous that morning.

I remember that night so well. I was almost scared to look at the test. When I saw that it was positive I shouted for joy.

My husband was coaching at a basketball game, so I left the test on the bathroom sink. When he got home he asked me what it meant and I told him that he was going to be a daddy. We hugged and kissed and thought about what the future would hold.

Tonight, eleven years later, as my family of six went to our oldest son's Christmas program I thanked God for blessing us with four beautiful children. I am not sure that I had any thoughts on my mind eleven years ago other than how wonderful it would be to have a baby of our own.

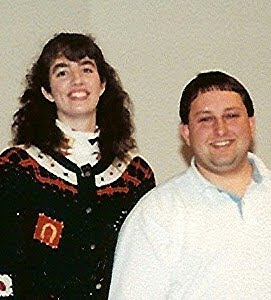
JT and Jackie December 1998


I do wish I could have stayed like that happy 24 year old version of myself every other time I saw two lines on a pregnancy test. Eleven years ago I never knew the pain of miscarriage. I had read about miscarriage, but never knew that it would happen to me four times.

Yet, in those sad times of loss I became the woman I am now. Without those scars I am not sure I would have been able to be of help to my friends who have experienced loss. Maybe I wouldn't have appreciated just how precious and fragile life really is.

So, tonight, eleven years after finding out I was going to be a mom, I am grateful for all the highs and lows I have experienced during my time as a mother. God has truly blessed us.

Upon reading this post again I felt like I should clarify that the positive test I got eleven years ago resulted in the birth of our first child-our daughter Julia.

Check out Heavenly Homemakers to see what others are grateful for this Gratituesday.

Proverbs 3:5-6

5 Trust in the LORD with all your heart,
And lean not on your own understanding;
6 In all your ways acknowledge Him,
And He shall direct your paths.
Share/Bookmark

Thursday, December 3, 2009

Stitching Up Some Fabric Boxes


Today I am once again joining Sarah of The Fifth Street Palace and Abbi of Proverbs 31 Living for another Thursday of sharing a homemade Christmas project.

Back in February I made myself a fabric box using this tutorial. I keep my cloth napkins in it and have found the box to be practical and attractive.


Well, this past summer I cut out the fabric to make several more. This week I have made five that will be Christmas gifts. They really aren't hard to make, but I definitely recommend using a good interfacing. I don't think mine was stiff enough, but it was what I had on hand.

I plan to put some homemade goodies in the boxes. I have been making some candies, and I just posted last night about what I have made so far.

With our advent calendar and nativity sets from my mom and grandma, baking goodies, listening to Christmas music, and continuing to make gifts it's beginning to feel like Christmastime. :-)
Share/Bookmark

Wednesday, December 2, 2009

I have 32 pounds of browned burger in my freezer!


You read that title right. Last Friday some family friends brought over a huge bowl of ground deer burger. They butcher and process the deer they hunt, and have blessed us for the past two years with deer meat. Last year I just froze the meat in bags without cooking it. Then, every so often would brown up about five pounds at a time and either cook with it or freeze it in 2 cup increments for quick meals later. This year I decided to eliminate a step. With the help of my husband (who likes to brown up burger for some reason) we browned up all of the burger and now have a freezer full of 32 packages of browned burger. This will be great for quick meals like spaghetti and tacos. What a blessing!!!

On Saturday I cooked up some beef hamburgers. We ate some and I was able to freeze a dozen for a quick meal at a later date. It is a blessing to have plenty of food in my freezer and pantry. I would love to some day jump on board the once a month cooking bandwagon like Money Saving Mom and Life as Mom have been doing the past two days. However, right now that isn't something I am able to accomplish with my preschool and babysitting.

I have been doing some various baking ahead for the holidays, though.


Yesterday I made two batches of Pretzel Brittle.


Tonight I hope to make some Cashew Brittle.


This past weekend I also froze a batch of Pumpkin Chocolate Chip Muffins (Blogged about here.) If you want to freeze muffins then first line them up on a cookie sheet and stick them in the freezer. Once they are frozen you can put them in a bag. This will prevent them from getting smashed.


Lastly, I made a batch of butter pecan brittle that I found in an old book of my mom's. Here is the recipe.

Butter Pecan Brittle
2 Cups Sugar
3/4 Cup Light Corn Syrup
1/4 Cup Water
Mix in a pot and boil until 300 to 310 degrees. (Use a candy thermometer.)

Then add:
3 Cups Coarsely Chopped Pecans
1/4 Cup Butter
1 tsp. Vanilla
1/2 tsp. Salt
Stir until butter is melted.

Add 1 tsp. Baking Soda. Pour onto a buttered cookie sheet and allow to cool. Once cool break into pieces.

Making this candy ahead of time (It is going in the freezer until Christmas.) will hopefully make my holidays a little less hectic. What holiday goodies do you like to bake?
Share/Bookmark

Tuesday, December 1, 2009

Handmade Nativity Sets and Advent Calendar

My maternal grandma was very crafty and was always working on one project or another. Some were silly and some were practical. The craft she made that got use every year was an advent calendar. She made one for each of her four grandchildren. (I just looked at the back and it says 1982. My grandma was always so good to date things like that.)


The advent calendar was made from a piece of poster board cut into the shape of a Christmas tree and then covered with felt that had 25 numbered pockets sewn on it. It was trimmed in ric rac, a pom pom and a metallic flower.

Every year she would put little trinkets or coins in each pocket and then send them home with us. We always enjoyed finding the little surprises. As we got older she often put numbers in the pockets and had corresponding gifts in a sack.

My mom has now carried on the tradition in a more meaningful way for my children. The past three years she has put little slips of paper in each pocket which contain bible verses, thought provoking questions and life application ideas. My children and I have enjoyed learning more about the meaning of Christmas. When we are done reading I pull out the little presents she has wrapped and numbered for each of my children. This is truly a tradition I am glad my mom brought back.


My husband and I got married two days before Christmas almost 14 years ago. I am not sure why we did that to everyone. However, I do love Christmas and had a beautiful wedding complete with snow on the ground. :-)

Anyway, that year my mom made the gorgeous nativity set above. Not only did she make one for us, but she made many sets. (How many, Mom?) She cut the wood herself and painted and stained everything. I can't even begin to imagine all of the hours she spent. I was so busy with wedding preparations, college, and working that I don't even remember her working on them. If I didn't appreciate all of the time and love she put into making this set back then, I sure do now. (Thanks, Mom!)

Probably at least 10 years prior to making that nativity set my mom made this set.


She used scrap 2x4's and stained them. Then she cut out felt and glued it on to make this child friendly nativity set. My children have loved playing with this set during the past few years.

These three items made by my mom and grandma are special to me because of the love put into making them. More importantly, they represent the birth of the risen Savior I serve.

Do you have a special nativity set or advent calendar? What traditions do you have that make the Christmas season more meaningful to you and your family?
Share/Bookmark