This week has been a busy week during which I have done lots of cooking. I have taken a little break today so I can go out and enjoy the beautiful day. Before I do that I thought I would share a few new recipes that I made this week.
Chili Mac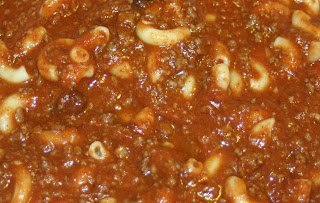
1/2 Cup Cooked Veggie Puree
1 Cup Cooked and Pureed Beans
1 Quart Tomato Sauce
2 Cups Cooked Ground Burger
1 Tbsp. Honey
4 tsp. Chili Powder
1 tsp. Sea Salt
1/2 tsp. Garlic Powder
1/2 tsp. Onion Powder
1/8 tsp. Pepper
2 Cups Cooked Pasta
1/4-1/2 Cup Cooked Whole Beans
Combine all ingredients in a skillet or pot and heat to boiling. Simmer for 10 minutes stirring occasionally. Remove from heat and serve.
This recipe is very easy and can be thrown together quickly because many of the ingredients are pre-cooked. Home canned tomato sauce was used. (I make my sauce by simply cooking down tomato juice until it is the desired consistency. A simple way to do this is to put a gallon of tomato juice in a crock pot without a lid until the sauce is cooked down enough)
For the batch pictured above butternut squash was used as the vegetable puree, kidney beans were the bean, ground venison was used for the burger, and macaroni was used as the cooked pasta. A food processor makes short work of the pureeing process. We cook up large batches of ground burger with chopped onion and freeze in 2 cup increments which speeds up meal prep tremendously. Beans can be frozen whole or mashed to save time as well. A large batch of macaroni was cooked and used for this dish and homemade macaroni and cheese.
This is my own recipe, and it was a big success. It is packed with all sorts of good things and is very frugal.
Fried Bananas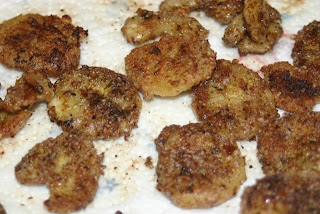
1 Banana
2 Egg Yolks (Wash off egg whites.)
½ Cup Almond Meal
Bacon Grease
Heat a skillet over medium heat. Add 1 to 2 tablespoons of bacon grease to the skillet. (I like to use a cast iron skillet.) Meanwhile, slice the banana into approximately ¼ inch thick slices. In a bowl, beat the rinsed egg yolks. Dip the banana slices into the egg yolk and thoroughly coat each side. Put the almond meal in another bowl and coat the banana slices with it. Fry the banana slices in the skillet turning once. Remove from skillet when slices are browned on each side. Serve and enjoy this tasty treat that is packed with nutrition.
This is my own recipe based on something I read from the Weston A. Price website. My toddler loved it and I know he was getting needed fats and nutrition with each bite.
Hummus
2 Cups Cooked Garbanzo Beans/Chickpeas
2 Tbsp. Lemon Juice
2 Cloves of Garlic
2+ Tbsp. Water (Start with 2 and add more if needed)
1/2 tsp. Sea Salt
1 1/2 Tbsp. Tahini or Other Nut Butter
2 Tbsp. Olive Oil
Combine all ingredients in a food processor and process until mixture is a smooth adding more water as needed to achieve desired consistency.
To cook dried garbanzo beans first rinse and drain 1 pound of beans. Soak for 12-24 hours in a large pot with plenty of water and a few tablespoons of lemon juice. After soaking drain and rinse beans once more. Cook in a pot with fresh water for 1 and 1/2 hours after they start to boil. Drain and use in this recipe. Freeze the remaining beans in 2 cup increments to easily make additional batches of hummus.
This recipe came from someone on one of my online groups. She used much more lemon juice, but I prefer less and use more water instead.

Some New Recipes


