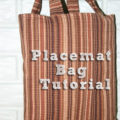
During my recent day of crafting in real-time I made a placemat purse/Bible bag.

This little bag is so quick and easy to make you could probably stitch one up in 15 minutes.
If you didn’t already know it, I kind of have a thing for sewing with placemats. I have even created several tutorials using them.

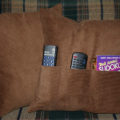
The placemat I used for this project was one I had purchased at a yard sale. I cut the straps off of a bag that had seen better days. They were approximately 12 inches each in length.

The first thing you need to do is pin the handles equidistant from the two short sides (on the wrong side) of the bag. I think I pinned these handles 4 1/2 inches from the sides of the bag.
Next, sew the handles to the bag using a straight stitch. Go back and forth about 4 times. You can even use a zig-zag stitch once or twice for good measure. The reason I stitch over the same area several times is because where the handles are sewn on are the stress points. You don’t want the handles ripping off while you are carrying your bag.
You will have four total places to sew the handles on. Two for each side. Be sure that your handle isn’t twisted before sewing.

Now, you can sew the side seams. You will fold your bag, right sides together, so that the two short sides with handles meet at the top. You will then sew the two open sides of the bag that don’t have handles attached using a 1/2 inch seam allowance. You will not sew the folded side.

The final step is to sew the bottom two corners of the bag. I am going to refer you to my first placemat bag tutorial for thorough instructions. Check it out here.

That’s it. You now have a simple little purse that could even be used as a Bible bag. I imagine I made it sound more difficult than it really is. If you have any questions please let me know.

I also wanted to show you this placemat purse that I made for Julia a few years ago. It was made from a suede placemat and grosgrain ribbon. Just a fun little variation on the same theme.