I know she is cute, but try to focus on the blankie. 😉 That’s what I’m going to show you how to make today.
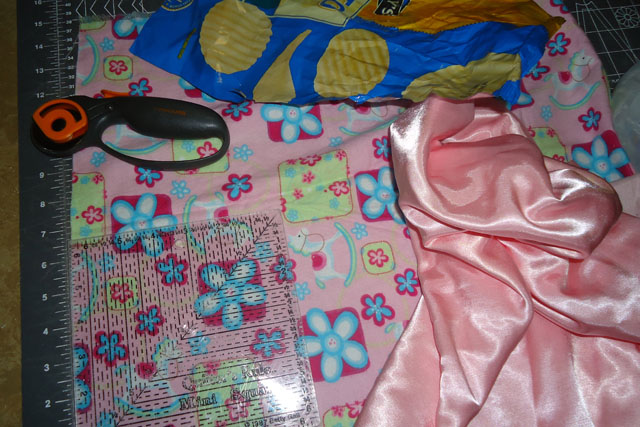
To make a small blankie you will need a 2 pieces of fabric that are 6 1/2 inches square. I chose a piece of flannel and a piece of flannel backed satin.
You will also need a 6 1/2 inch square cut from a crinkly chip bag (Wipe the piece of the bag off with a soapy washcloth before sewing.)
Additional items needed are ribbon (satin or grosgrain, think washable), a sewing machine, thread, scissors and pins.
Once you have your two outer 6 1/2 inch pieces of fabric and chip bag cut you are ready to sew. First, baste the chip bag to back side of one of the pieces of fabric using a long stitch.
Next, cut 4 (or more if you want) pieces of (grosgrain) ribbon. I made mine 5 inches, but I think 3 (or 4 inches at the most) would be much better. They were too long at 5 inches as you can tell from the final pictures.
Baste the ribbons to the fabric/chip bag combo by making them into loops first. Make sure that the loop ends are on the inside and the open ends are towards the outer edges.
I didn’t do this, but I would like to make a suggestion. Place the open edges of the ribbon farther out from, not even with, than the edge. This will ensure that you catch the ribbon while sewing. You can trim the ends before you finish the blankie.
Next you need to place the second fabric square on the fabric/chip bag combo, right sides together, and pin in place.
Using a 1/4 inch seam allowance sew around the blankie being sure to leave about a 2 inch opening for turning. Clip the corners and then turn the blankie right side out.
Once you have the blankie turned right side out you will need to topstitch around the whole blankie. You can use any stitch you like. I used a zig-zag stitch.
You can use this same method to make any size of non-crinkle blankie, but I wouldn’t make a crinkle blankie much bigger than this.
I do want to mention this, but the last time I checked you weren’t able to sell “taggie” blankies because it would infringe on a patent. An alternative is to make them not looped.


