When we picked 72 pounds of strawberries last week at a nearby up-pick strawberry patch I used several methods to preserve them. I made 32 jars of strawberry jam, froze over 8 gallons, made strawberry pies, ate quite a few, and even canned 3 pints of sliced strawberries.
Today I wanted to share with you how easy canning strawberries is. They would be great on ice cream or on cake instead of icing.

Here’s how you can preserve strawberries by canning them.
Supplies
- Strawberries
- Sugar
- Canning Jars
- Canning Lids
- Canning Rings
- Water Bath Canner
- Small Spatula
- Large Pot
- Small Pan
- Knife
- Canning Funnel
- Jar Lifter
- Paper Towel or Towel
- Water
Instructions
1. The first step is obviously to pick strawberries. 
2. Rinse off the strawberries and measure how many you are going to can.
I decided to can just a small batch of strawberries since I had never done it before. I used 3 quarts of strawberries.

3. Cut the stems off of the strawberries, cut them into slices (I cut mine into fourths.), and place them into a bowl.
4. Add sugar to the strawberries and stir gently.
You will need to use 1/2 cup of sugar per quart of strawberries. I used 1 1/2 cups of sugar total.
5. Cover the bowl and put it into the refrigerator for about 5 to 6 hours.
6. Fill your water bath canner with water and bring to a boil.
7. Place the canning jar lids in a small saucepan of water and allow them to simmer while you work on the following steps. Also, wash your jars and place them in a large pot of water and simmer or use water that has already boiled.
8. Pour the strawberries, along with the juice, into a large pot.

9. Bring the strawberries and juice to a boil.
10. Once the strawberries are boiling, use a slotted spoon to remove the strawberries from the pot.
11. Divide the strawberries between your canning jars. (A canning funnel is a great tool for adding foods to canning jars.)
I used three pint jars which meant there was a little over a cup of strawberries in each jar.

12. Boil the syrup that is left in the pot for about 15 minutes so that it can get a little thicker, but not so long that it will turn into jam.

13. When 15 minutes has passed, remove the pan from the heat and pour the syrup into the jars to within 1/2 to 1/4 of an inch of the top of the jar.
You will probably have a little syrup left over which you can use on ice cream right away.
14. Use a small spatula to remove air bubbles from the jars by running the spatula along the sides of the jars.
15. Wipe off the rims of the jars with a paper towel or cloth towel.
16. Place a canning lid (that has been simmering in a pan of water) on each jar.
17. Tighten a canning ring on top of each jar until you meet resistence. Do not over-tighten the ring.
18. Place the jars into the water bath canner and bring the water to rolling boil.
19. Once the water is boiling well, set a timer for 10 minutes.
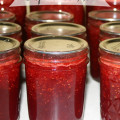
20. When 10 minutes has passed, use a jar lifter to remove the jars from the canner and place them on a towel to cool for at least 24 hours.

21. Check the jars to be sure that the lids have all sealed (Make sure they don’t pop up and down when you press the center of the lid.) and label them.
I plan to use my jars of strawberries over ice cream or on a white cake in place of icing. I think I will have to can more strawberries next year because freezing 8 gallons of strawberries took up a lot of room.
This post contains affiliate links. Thank you for supporting this site.


Pingback: Hello Friday (Vol. 7) - Red and Honey()