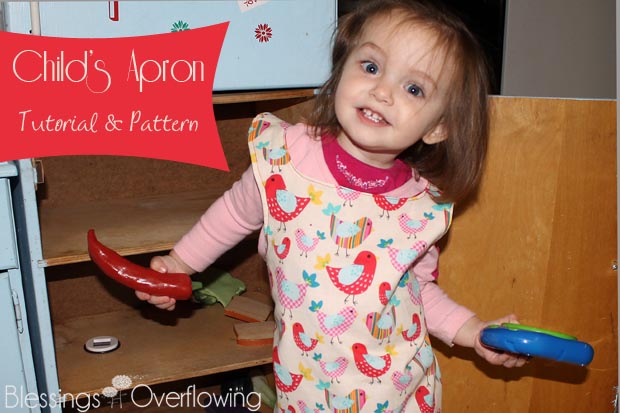
Back in November I decided to make an apron for my niece since she was going to be getting a kitchen play set for Christmas. Of course, I had to make Janna an apron, too.
I knew that I wanted the apron to fit over the girls’ heads so that they could wear it without having anyone tie it on them if they didn’t want to.
The other requirements I had were that the aprons be reversible and be big enough that they would last for several years.
So, I fiddled around with creating my own pattern, and I am excited to finally share the free printable pattern pieces and tutorial with you!
The first thing you will need to do is print the free pattern. Click the link below to download and print the pattern pieces. Go ahead. I’ll wait. ![]()
Be sure that your printer is set to “no scaling” or “page scaling: none” so that it will print at the correct size.
Child’s Apron Pattern Pieces
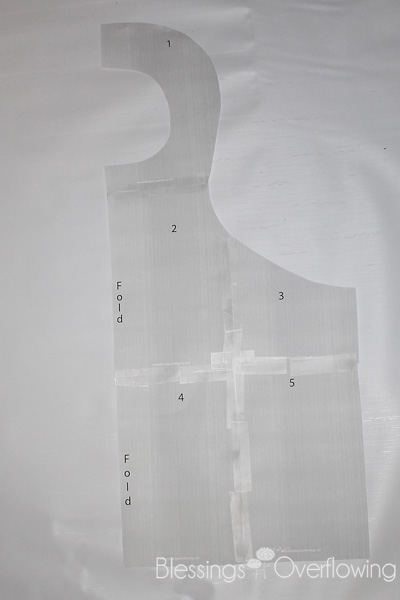
Now that you have printed out the pattern, cut out the grey pieces and tape them together like in the picture below.
I just used regular tape and butted the edges up to each other with no overlapping. Here is a close-up of how the pieces go together. I obviously didn’t do a perfect job, but it should still work just fine for you.
Once you have your pieces printed out you need to pick out your fabric. I purchased 1 yard of two different fabrics and had enough to make two aprons out of it.
Supplies
- Pattern
- 2 Coordinating Fabrics (1/2-1 Yard of Each)
- Scissors
- Thread
- Pins
- Double Fold Bias Tape (Optional)
Instructions
1.Fold one of the fabrics you chose in half so that the pattern will fit on it. Cut around the pattern.
Do the same process with the second fabric.
2. Cut two ties that are 18 inches x 2 1/2 inches.
The following steps will show you how to make the ties.
3. Fold one end of each tie piece, towards the wrong side, 1/4 inch and press.
4. Fold each tie in half and press.
5. Open the ties and fold each raw edge towards the center line you created in step 4 and press.
6. Fold both ties in half along the original fold line and press.
7. Stitch along the three open edges of the tie using a 1/8 inch seam allowance.
8. Place the two apron pieces, right sides together, and pin in place.
9. Insert one tie on each side of the apron, between the two layers of fabric, so that the unfolded short edge is lined up with the raw edge of the apron.
Make sure that the rest of the tie fabric is inside the apron, away from the raw edges, towards the middle.
The short raw edge of the tie should be right below the curve on the straight side near where I have the wording in the picture below.
10. Use a 1/4 inch seam allowance to sew around the entire outside edge of the apron.
Do NOT sew around the circle neck opening.
This is what your apron should look like at this point. the neck opening hasn’t been sewn, but everything around the outside has. The ties are sandwiched inside the apron and have been sewn on each side just below the curve on the straight sides to the left and right of the apron.
11. Turn the apron right side out through the neck opening.
Smooth all of the seams so that they will lay flat and be even. It might be a good idea to press the entire apron at this point.
Neck opening option 1:
12. Fold the raw edges of the neck opening under, of both layers of fabric, 1/4 inch and pin in place.
This step is a little tricky, so you may want to check out option 2 below before committing to this method.
13. Using a 1/8 inch seam allowance sew around the neck opening. Then, sew around the entire outer edge of the apron using a 1/8 seam allowance as well.
If everything went correctly for you, you should now have a reversible child’s apron. If something didn’t go the way you thought it would, please let me know and I will try to make my directions more clear.
Here is the back side which looks just as nice as the front.
Neck opening option 2:
If you would like a little easier option for step 12, you will need some double fold bias tape or even fold over elastic (That’s what I used.). You can even make your own bias tape out of fabric by following steps 4-6 above using a longer piece of fabric.
Open the bias tape and apply it to the neck opening. Pinning as you go.
When you get back to the beginning cut off the bias tape but leave a little extra so that you can overlap where you started. Fold the raw edge under and pin it in place.
Think of it as putting two pieces of bread around some lunch meat. The bias tape is the bread and the neck opening is the lunch meat. Clear as mud?
Stitch the bias tape to the apron along the open edge of the bias tape. Choose a seam allowance that will ensure the bias tape is sewn to the apron on both sides.
You want to make sure that the neck opening is totally covered by the bias tape so double check your pinning on both sides before sewing.
Now you have an apron with a contrasting neck opening.
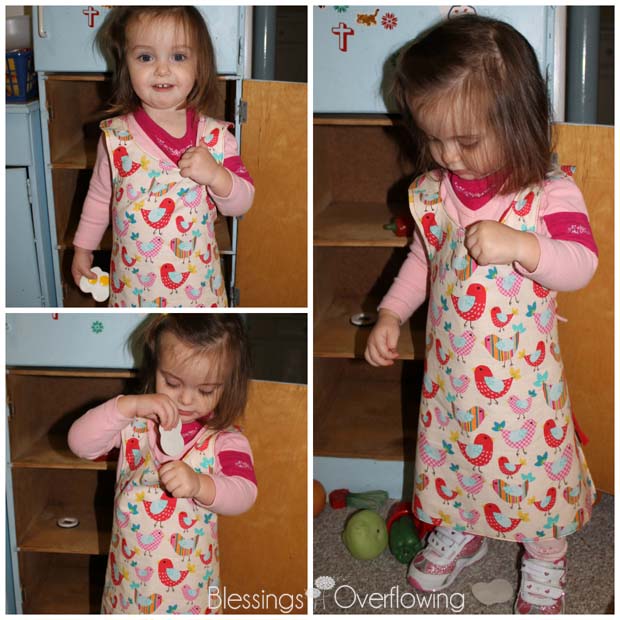
Janna seems to like her apron. When I first put it on her she looked at it and smiled. Then, she decided it would be a good place to store her play food. However, she scrapped that idea after realizing it went straight to the floor. ![]()
Janna is 21 months old and you can see from the pictures above how the apron fits her.
I convinced Joshua, my 8 year old, to try the apron on and this is how it looks on an older child.
I’m not sure whether he was happy or a little put out that I asked him to try it on. ![]()
I am hopeful that my daughter and niece will be able to enjoy their new aprons for several years.
If you make an apron using this pattern I would love to hear from you!
Legal Stuff: If you choose to make an apron from this pattern and post about it on your blog please provide a link back to this post. Also, if you sell an apron using my pattern I am fine with that as long as it isn’t mass produced and you provide a link back to this post. Also, do NOT post my pattern on your site. I am offering the pattern for free and I would hate it if someone abused my niceness and ruined it for everyone else. Thank you.
I am linking this post to:


