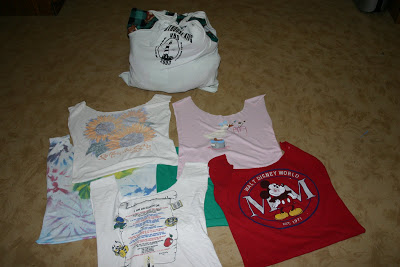
A few months ago my husband went through his closet and took out quite a few t-shirts from his coaching days. He cut up the shirts and made rags out of them, but he saved the printed fronts and backs. He mentioned that he would like for me to make him a t-shirt quilt sometime. I am sure he thought it might take me 20 years to complete the task, but I decided to prove him wrong.

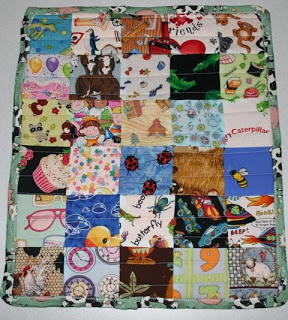
I worked on the quilt here and there over the last week and finished it this afternoon. I am happy with the result, but wouldn’t want anyone to critique it. My hope is that my husband will be pleasantly surprised on Christmas morning.

I tried a couple of new things when making this quilt. I used basting spray to hold the top, batting, and backing together so that I could quilt the layers without pinning. I used the spray because my husband’s aunt recommended it. After talking to her again I realized why it was so hard to use. She said when you use it for a big quilt you should have someone help you.
Here are a few details about the quilt. I cut all of the t-shirts using a 12 1/2 inch quilting square. I used a fusible interfacing on each square to give the fabric more stability. Then, I stitched the squares together using a 1/4 inch seam allowance. For the quilting I “stitched in the ditch” by sewing on top of all seams. I made the binding the way my husband’s aunt taught me. It is an easy way which isn’t on the bias. I will try to type up a tutorial soon because I don’t want to forget how I did it.
I did want to share that I got the quilt batting at the Goodwill a while back. It was in an unopened package and was enough for a king sized quilt. The original store price tag showed $20, but I got it for less than $2. Woohoo! The backing is just a quilter’s cotton, but a sheet would have worked as well. The quilt measures approximately 5 feet x 6 feet. I think it will keep my husband warm this winter. hat is assuming the kids don’t steal it from him. 
*I finished my quilt binding tutorial. Check it out.
If you would like step-by-step instructions for how to make a T-shirt quilt, please check out the posts below for all the details.
How to Make a T-shirt Quilt
- Week 1: Gather Supplies
- Week 2: Cut the T-Shirts
- Week 3: Interfacing
- Week 4: Sew the T-shirt Blocks Together
- Week 5: Quilting
- Week 6: Quilt Binding


Pingback: 25 Handmade Graduation Gifts {Printables & Tutorials}()
Pingback: 20+ Handmade Graduation Gifts - * THE COUNTRY CHIC COTTAGE (DIY, Home Decor, Crafts, Farmhouse)()