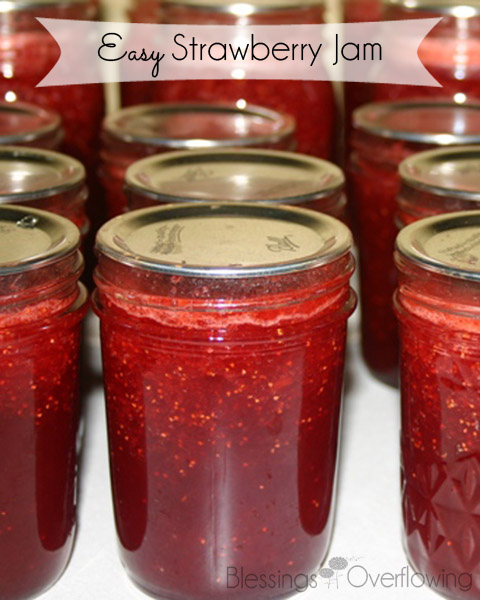
We have made 4 batches of strawberry jam using the strawberries we picked last Friday. I was thankful to have the help of my daughter and sister-in-law for 3 of the batches.

We ended up with 19 jelly jars and 10 pints of jam. We have almost gone through a pint, so I am glad we made plenty.
Here is how we made the jam, or “jammy” as my daughter is calling it. Since we pureed the strawberries, but didn’t strain the seeds I said it was a cross between jam and jelly. Julia came up with “jammy”. 🙂
Supplies
Water Bath Canner
Canning Jars
Canning Lids
Canning Rings
Jar Lifter
Canning Funnel
5 Cups Pureed or Crushed Strawberries
7 Cups Sugar
1 Box of Sure Jell
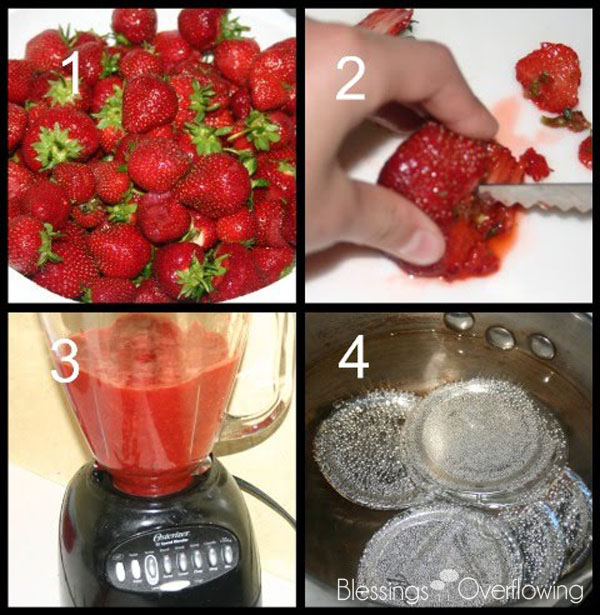
1. Rinse fresh strawberries and drain in a colander.
2. Cut the stems off of the strawberries and cut them in half.
3. Place strawberries in a blender and blend until smooth. If you want a chunkier jam just crush the berries with a cup, spoon, pastry blender, etc.
4. Place canning lids in a pan of water and simmer. Also, fill a water bath canner with water and bring to a boil.
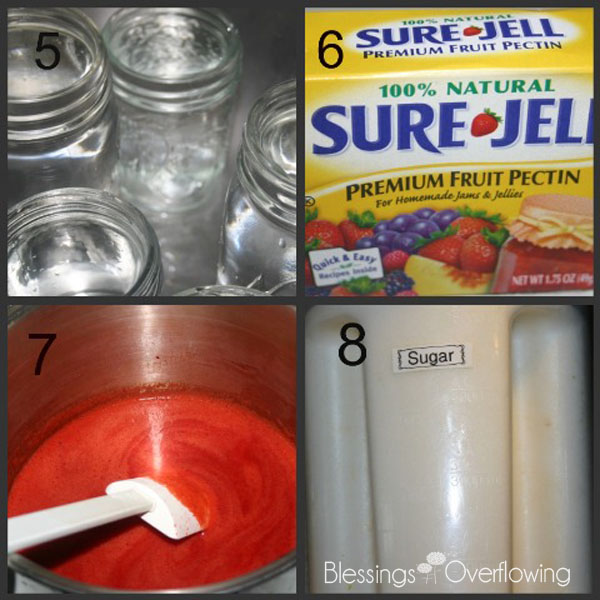
5. Either put boiling water into clean jelly or pint sized jars, or place jars in a large kettle of boiling water.
6. Put 5 cups of strawberry puree into a large pan. Add the contents of a box of Sure Jell and stir.
7. Bring the strawberry puree and Sure Jell mixture to a rolling boil.
8. Add 7 cups of sugar to the pan.
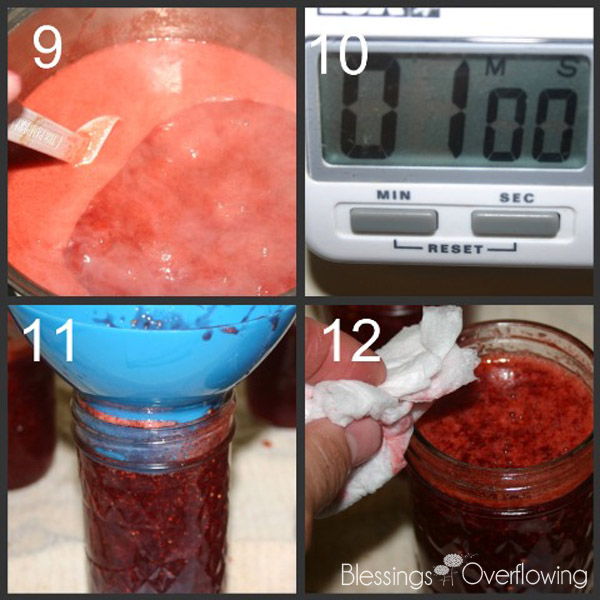
9. Bring to a rolling boil again.
10. Boil for 1 minute. Remove the pan from the heat and skim off any foam.
11. Using a canning funnel, ladle the hot strawberry jam into the hot jelly jars. (Be sure to empty the water from the jars first.)
12. Wipe the rims of the jars with a wet paper towel to remove any jam. Also, remove the lids from the hot water and wipe them dry with a paper towel.
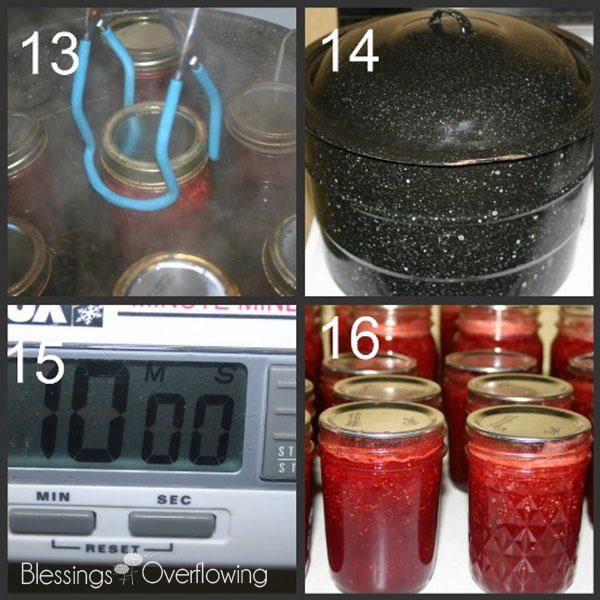
13. Place a hot lid and a canning ring onto each jar of jam. Tighten the ring just until there is resistance. Using a jar lifter, gently place each jar into the water bath canner.
14. Place the lid on the water bath canner and bring the water to a rolling boil.
15. Set a timer for 10 minutes.
16. Remove the jars from the canner and place on a towel. Do not move for 24 hours. Check lids to be sure they sealed. (The lid should not move when you push down on its center.) Remove the rings at this point, if desired.
Your jam is now ready to eat, store, share or any combination thereof. 🙂 Enjoy!
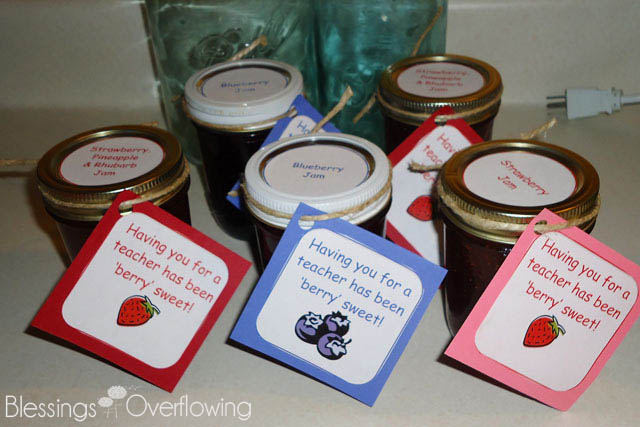
If you would like to print some labels for your jam to use for gift giving check out this berry sweet gift idea. There is a free printable you can download, customize, and print.
You may also want to check out my latest strawberry jam tutorial. It uses only two ingredients. 2 Ingredient Strawberry Jam Canning Tutorial